Containers
A containerContainerA grouping mechanism that bundles related tasks or appointments so planners can move and manage them together. groups tasksTaskA unit of work that belongs to a job. It appears in the open task list until it is scheduled to a resource. and appointmentsAppointmentA task scheduled to a resource for a specific period - the scheduled instance you see on the planning board. into a single logical unit so the planner can schedule them as if they were one entity. It's a flexible tool for enforcing business rules, and you can use it in many ways: building trips, enforcing work breakdown structures, defining manufacturing sequences, and more.
Containers are to tasks and appointments what rolesUser roleA named bundle of user actions assigned to users and user groups. Permissions flow through roles, never directly to a user. are to user actionsUser actionA single protected capability, such as 'edit appointment', that a role can grant. The building block of role-based access control.. They bundle records into one unit, letting the application treat the container as a proxy for everything linked to it. Instead of handling records one by one, you act on the whole group at once.
On their own, containers don't impose any behavior beyond visualizing their members and enabling drag and drop at the container level. When you need more, the back-office system can step in and change how the container behaves.
You'll work with containers in the open tasks grid, and they affect both the map and the planning boardPlanning boardThe main graphical scheduling surface where dispatchers drag tasks onto resources across a timeline..
How it works
The data model of a container is about as simple as it gets. It's a single entity that other entities, such as tasks and appointments, point to in order to define a relationship between them.
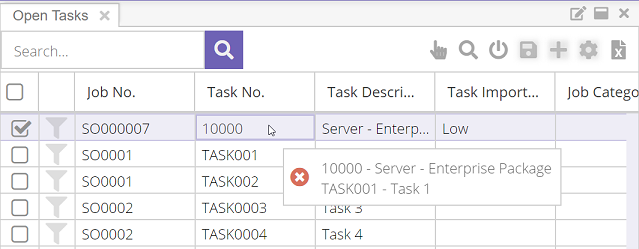
Container: Assemble bikes for Bill (invoice for company - order A01234) and his son (privately billed - order A01235)
├─ Task: Assemble bike for Bill
├─ Task: Assemble bike for Bill's son
By default, tasks in the planning board are planned one by one. Even when tasks are linked through service lines, job planning lines, assembly lines, and so on, the planner still has to plan each one individually. Containers add a second way of planning where tasks are planned as a group. The container acts as a proxy task that holds a series of tasks. Appointments and tasks still exist on their own and can be planned that way, but now there's a higher-level entity that links related appointments together.
Take a customer with two open orders that should be executed at the same time. In the back-office system, those two orders may have no direct link. A container solves this, because any appointment and any task can be linked.
When something changes in the planning, the planner can either reschedule each affected appointment manually or reschedule the container, which updates every record inside it.
A container carries no constraints by default. It needs a name and a color, and it holds a collection of tasks and appointments. Which tasks and appointments those are doesn't matter. Containers can span resources and departments, and appointments from any order can be planned through the same container.
Task and appointment containers
Two entities can use a container: tasks and appointments. Every task eventually becomes an appointment (a planned task), but before a task is planned, planners can already define a relationship between tasks through task containers. When you drag those tasks onto the planning board, the resulting appointments are already rendered inside a container.
When the order is created and ready to plan, the container will hold two tasks:
Container: Assemble bikes for Bill (invoice for company - order A01234) and his son (privately billed - order A01235)
├─ Task: Assemble bike for Bill
├─ Task: Assemble bike for Bill's son
When scheduled, two additional members will be added to the container:
Container: Assemble bikes for Bill (invoice for company - order A01234) and his son (privately billed - order A01235)
├─ Task: Assemble bike for Bill
├─ Task: Assemble bike for Bill's son
├─ Appointment: Assemble bike for Bill - 2022/05/01 10:00
├─ Appointment: Assemble bike for Bill's son - 2022/05/01 12:00
Tasks and appointments can be added to a container at the planner's discretion at any time.
Map
When you select tasks (across jobs) in the open tasks grid, the map adds pins for the locations of the selected jobs. If a task is connected to other tasks through one of its containers, the linked tasks are embedded on the map automatically. Selecting one task loads its connected tasks too:
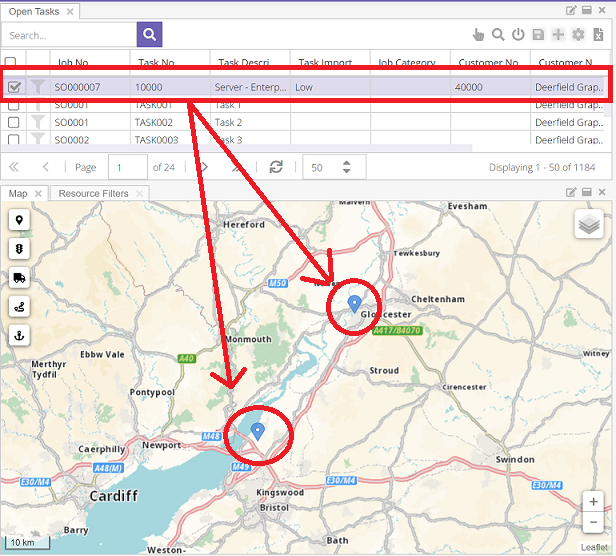
Planners who use the map to build trips for their resources gain the most here. With every related task already on the map, it's far easier to work out the most efficient route. Automating this step cuts down on errors and speeds up planning.
Planning board
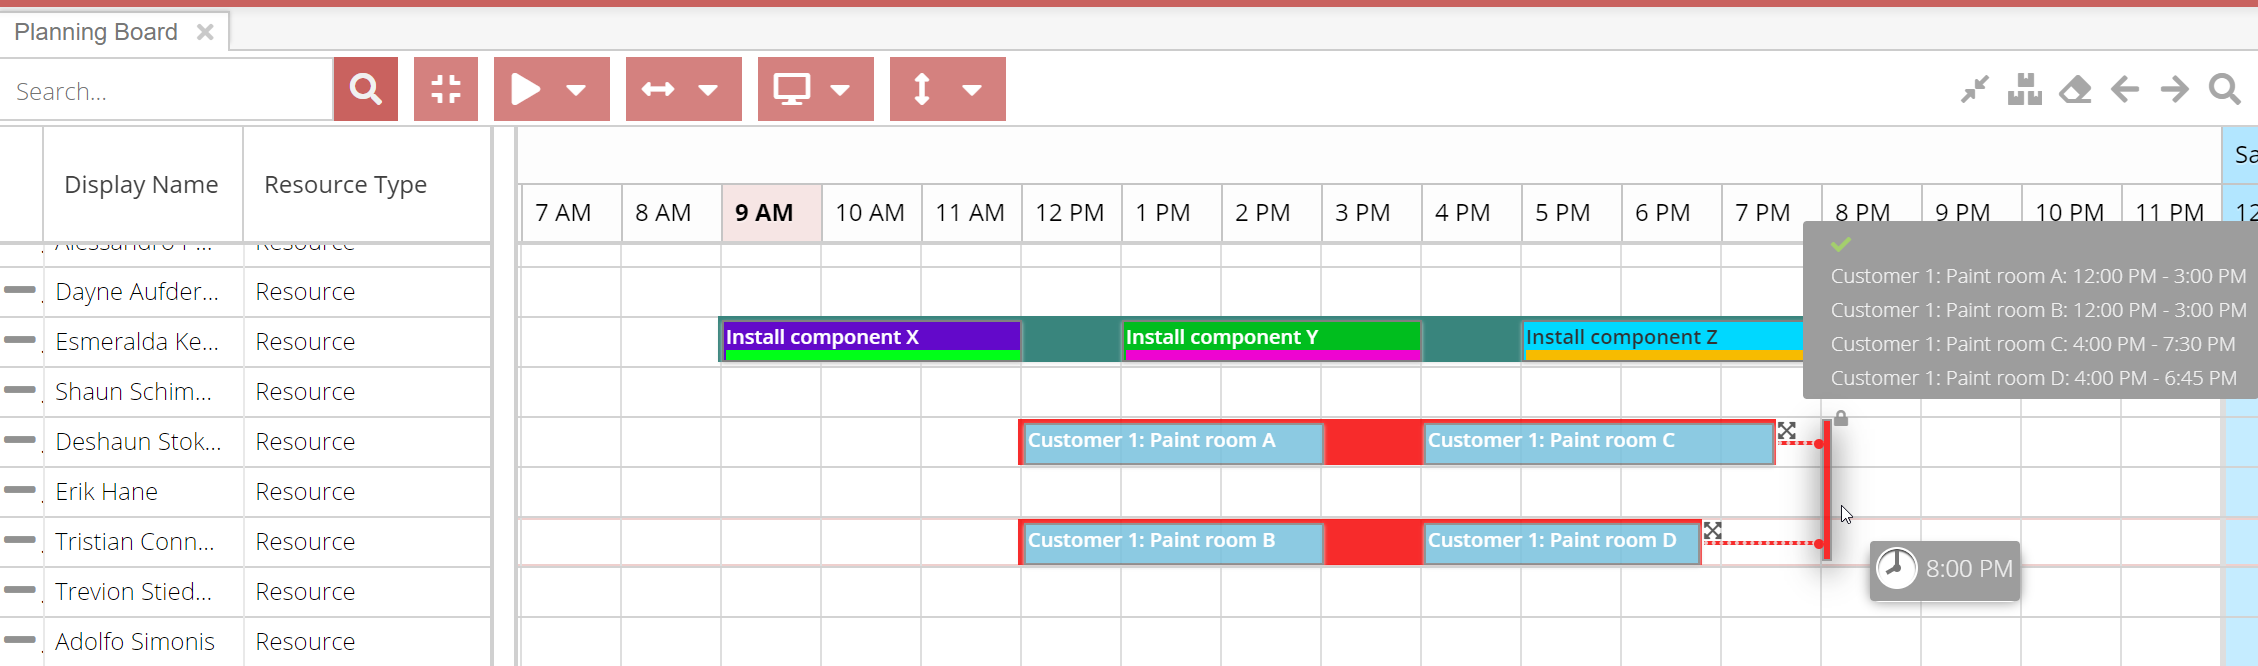
Drag and drop task containers
Once a task container is defined and tasks are assigned to it, planning one task by dragging it onto the planning board plans every other task in the same container. As you drag, the tooltip tells you which tasks are about to be planned. In the example below, dragging a container-backed task pulls the other related tasks (as defined by the containers) onto the planning board:
Dropping that task or set of tasks immediately renders a container on the planning board.

Creating containers on the planning board
The workflow above is an easy way to link tasks from the outset, but it's not the only one. Dime.Scheduler gives you the full set of tools to manage containers. Select appointments on the planning board and use the shortcut SHIFT + G, or the context menu, to create containers and add or remove members:
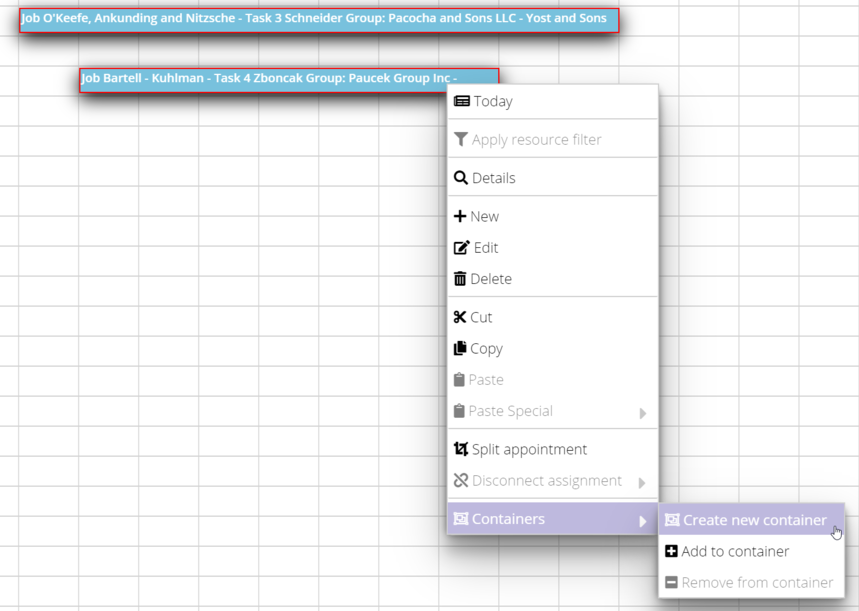
Give the container a name and a color, and you'll see the following view:
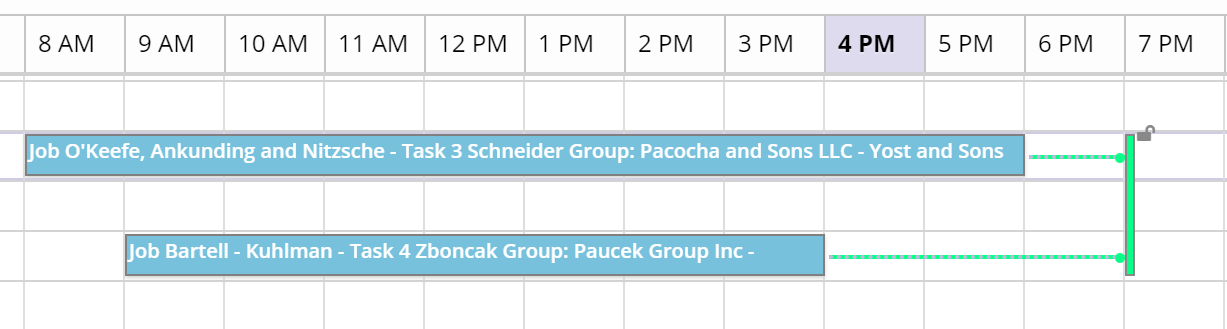
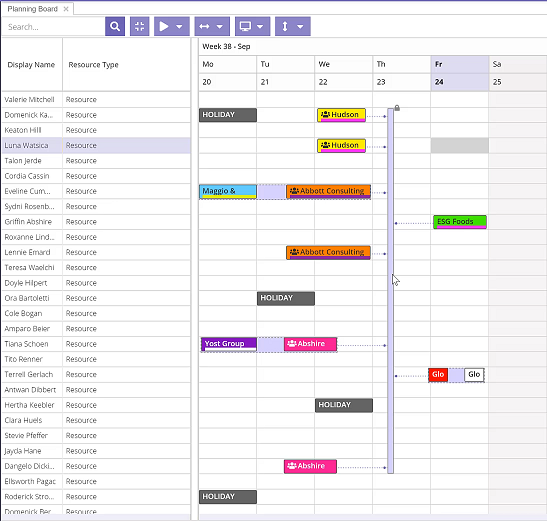
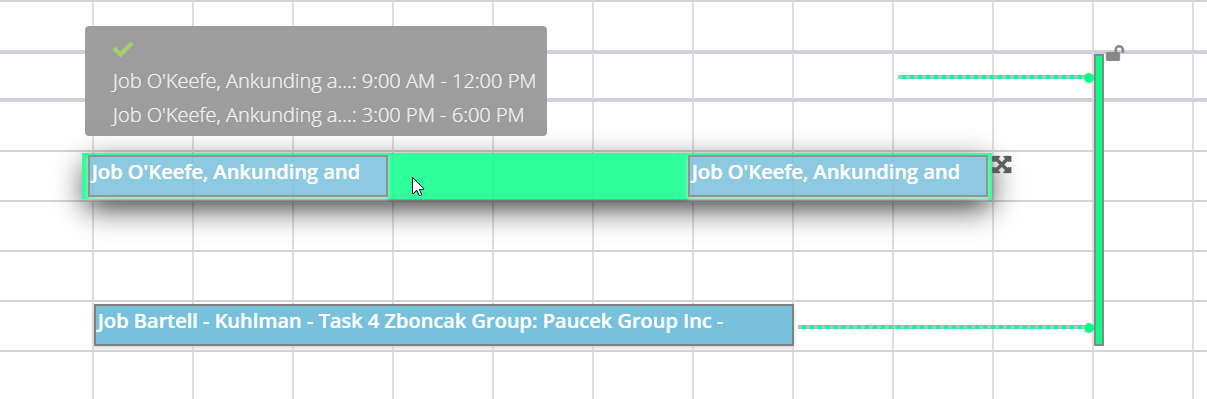
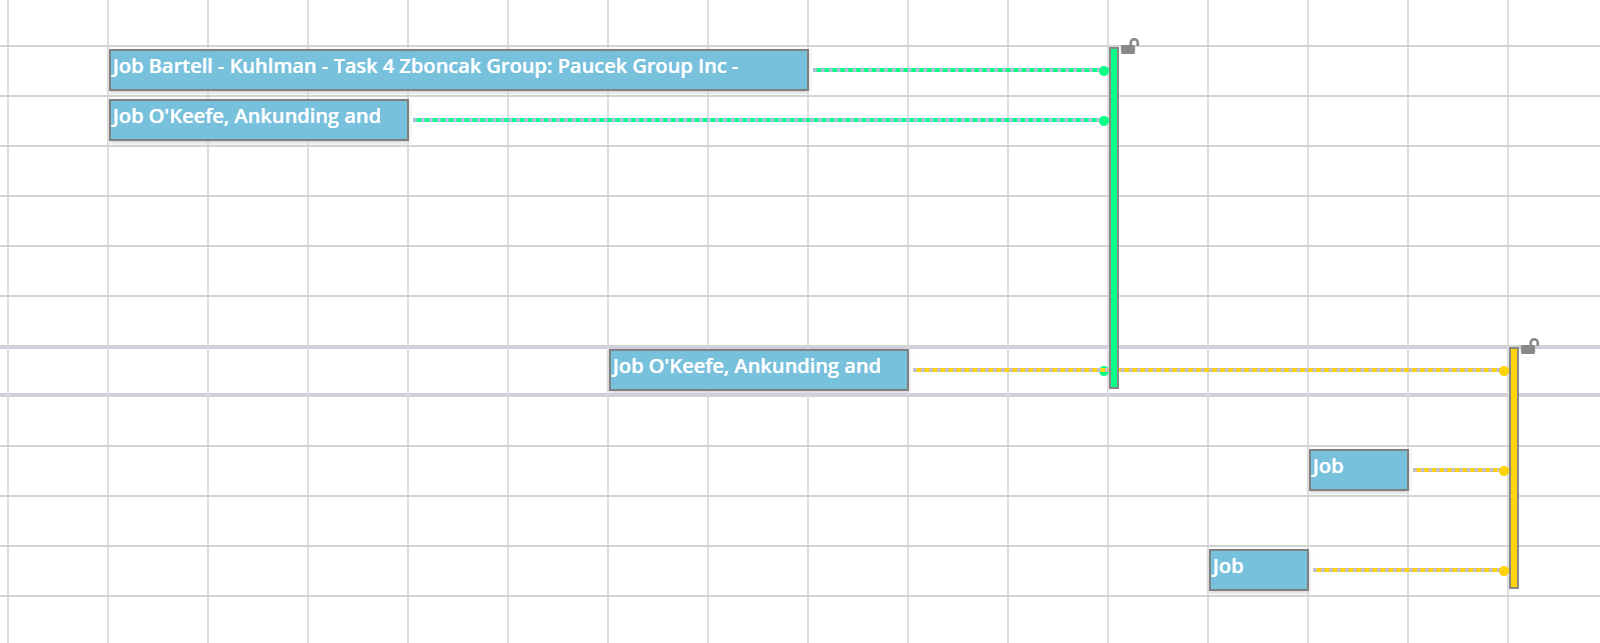
Multi-resource containers
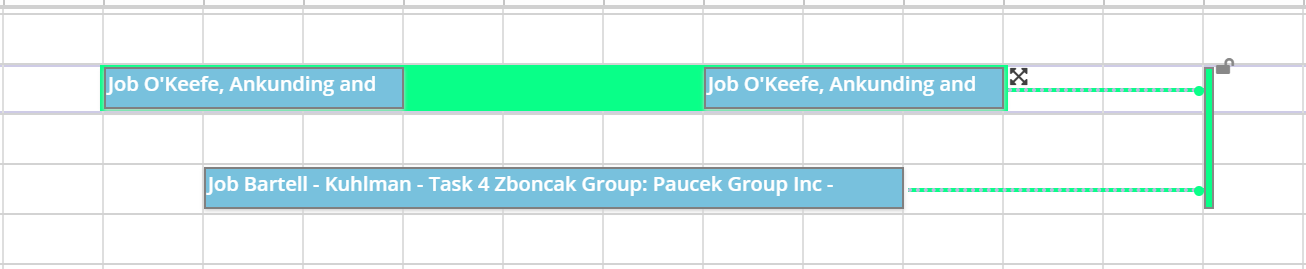
When a container spans multiple resources, a vertical handlebar appears. You can lock or unlock this bar by clicking the lock icon or double-clicking the handlebar. When it's unlocked, you can move the handlebar freely without dragging the container members along. When it's locked, the members move with the handlebar. When a container has multiple members on the same resource, a rectangle is drawn around them. This bar is draggable and moves the container's appointments for that resource along with it.
Validation rules run just as they do for individual appointments. As soon as one appointment fails validation, the entire container drag and drop action is invalid and the container won't drop.
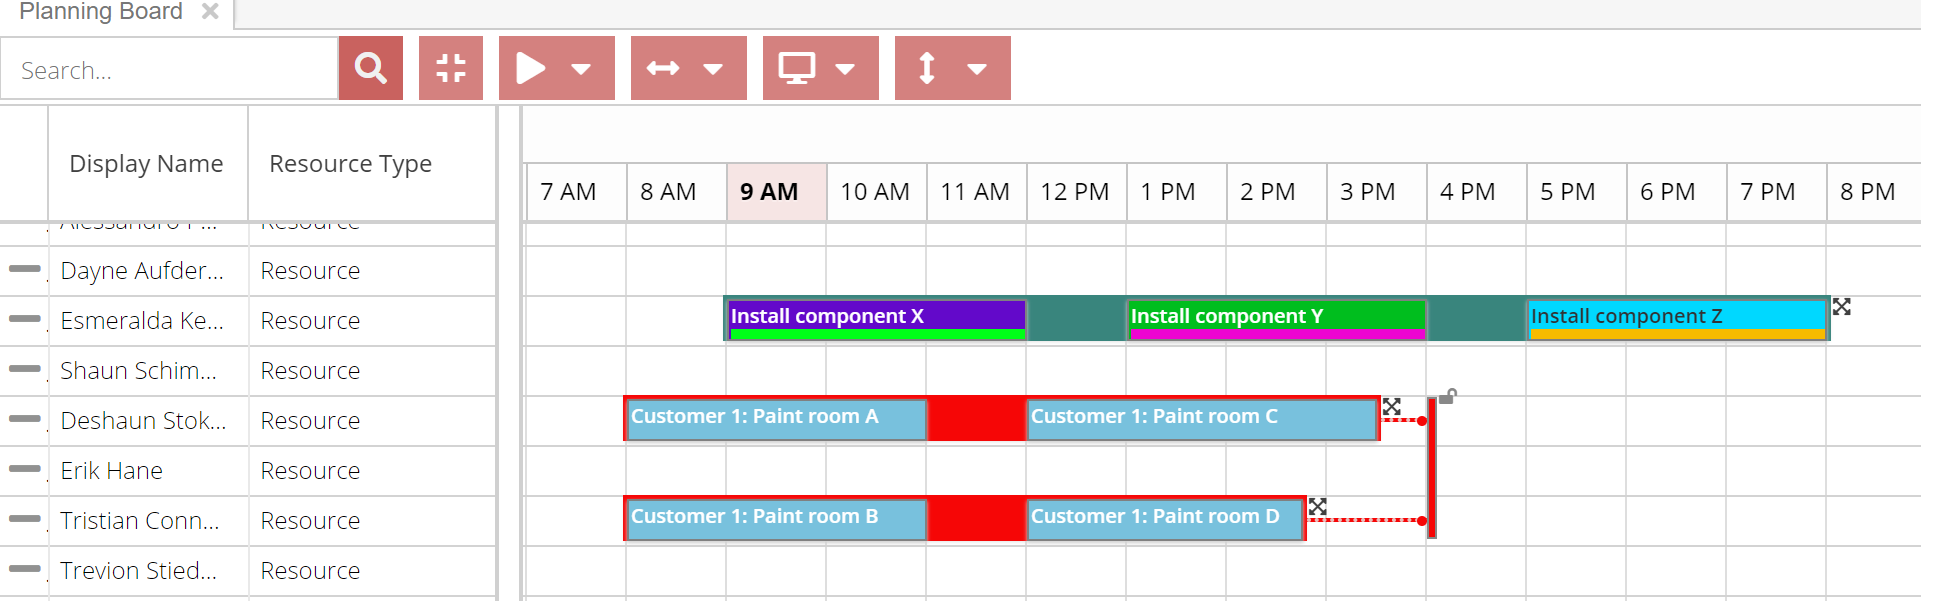
Single-resource containers
The horizontal bar drawn around a resource's container members can also reallocate the resource through drag and drop, exactly as you would with individual appointments in the planning board:
Validation rules run just as they do for individual appointments. As soon as one appointment fails validation, the entire container drag and drop action is invalid and the container won't drop.
Appointment's context menu
The context menus of both the container and the individual appointments let you add or remove container members.
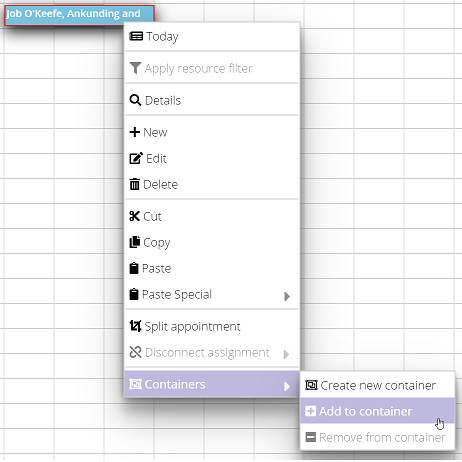
Either option opens a dropdown so you can choose which container to add or remove a member from (unless the appointment belongs to only one container). An appointment or task can belong to multiple containers, which opens the door to more complex relationships between tasks:
Container's context menu
Right-clicking the horizontal and vertical bars (and the lines that connect to the vertical bar) opens a context menu with several actions for managing the container:
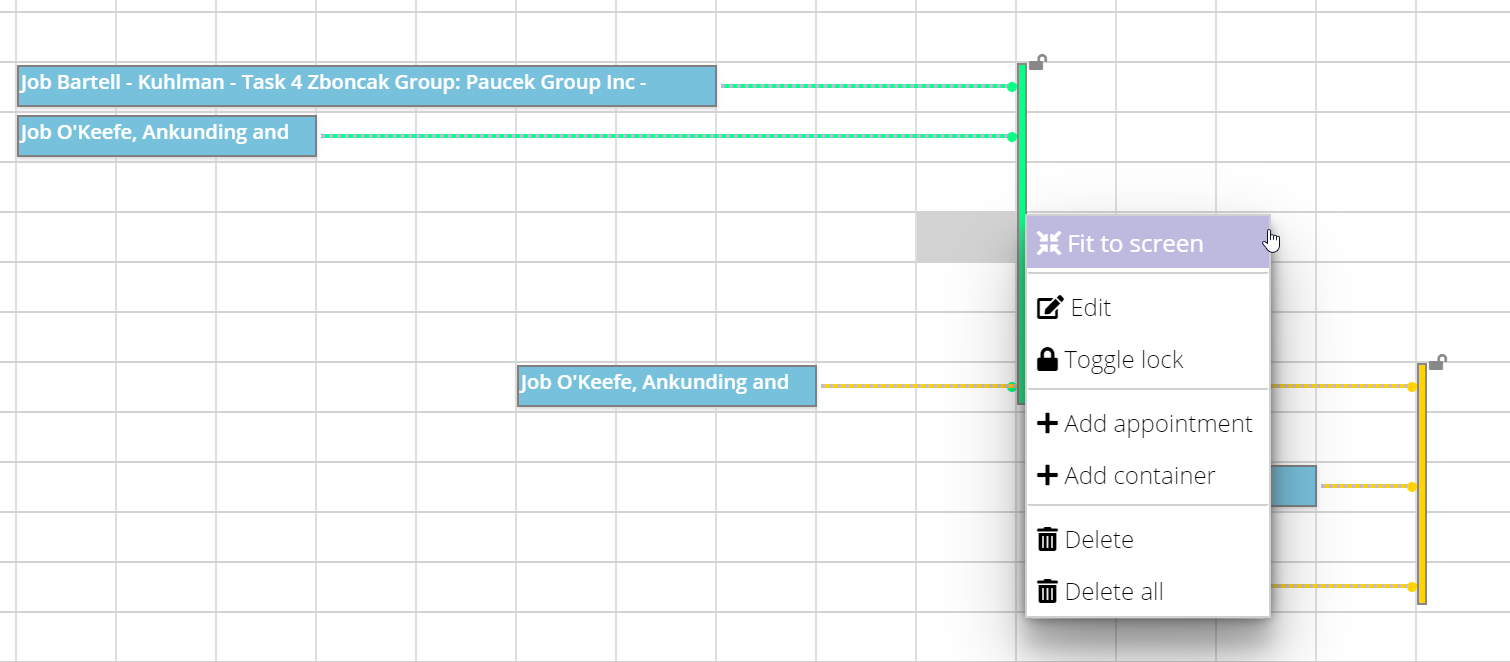
The planner can:
- Show the entire container in the planning board
- Edit the name and color
- In case of the existence of a vertical handle bar, lock or unlock the bar
- Add an appointment or container
- Remove the container
- Remove the container and its members
You can only remove a container from the planning board when it holds no task members. If the container has tasks, the action removes only the appointment members.
Toggling containers visibility
The button in the planning board's toolbar toggles the visibility of containers in the planning board.
Application setup
To view and use appointment containers, the 'Enable appointment containers' feature flag in the application setup must be enabled. Toggling this feature loses no data: it simply activates or deactivates the feature in the planning board.