Open Tasks
The open tasks component is the planner's inbox. Every taskTaskA unit of work that belongs to a job. It appears in the open task list until it is scheduled to a resource. the back-office application sends to Dime.Scheduler that still needs scheduling shows up here, in one filterable grid, until it lands on a planning board.
Without it, a planner has to chase work through the back-office system, spreadsheets, and ticketing tools, and every gap there means a missed appointment, a double-booking, or the wrong resourceResourceAn entity that can carry out work - a person, vehicle, tool, or room - that you schedule on the planning board. on a job. The grid solves that by surfacing every unplanned task in one place, decorated with the metadata the planner needs to decide who should do it and when. What a given planner sees is still gated by security and their own filters, but the principle is the same: nothing that needs planning is hidden from the person doing the planning.
An open taskOpen taskA task that has not been scheduled yet. It waits in the open task list to be placed on the planning board. is a task that has not yet been (entirely) planned. Budgets can require a certain amount of working time before a task drops off the list, which is useful when one task is meant to be split across several appointments.
What ends up here
Two kinds of tasks share the grid, because they belong to two different planning workflows:
- Planning tasks are independent units of work. Drag one onto a planning boardPlanning boardThe main graphical scheduling surface where dispatchers drag tasks onto resources across a timeline. and you have created an appointmentAppointmentA task scheduled to a resource for a specific period - the scheduled instance you see on the planning board..
- Project tasks belong to a larger project and are managed by the Gantt chart. They cannot be dragged onto the planning board directly. To schedule one, open its project from the row's context menu and plan it from the Gantt.
The "Task Type" column tells them apart at a glance. Add it to the grid if you work with both kinds.
How planning happens
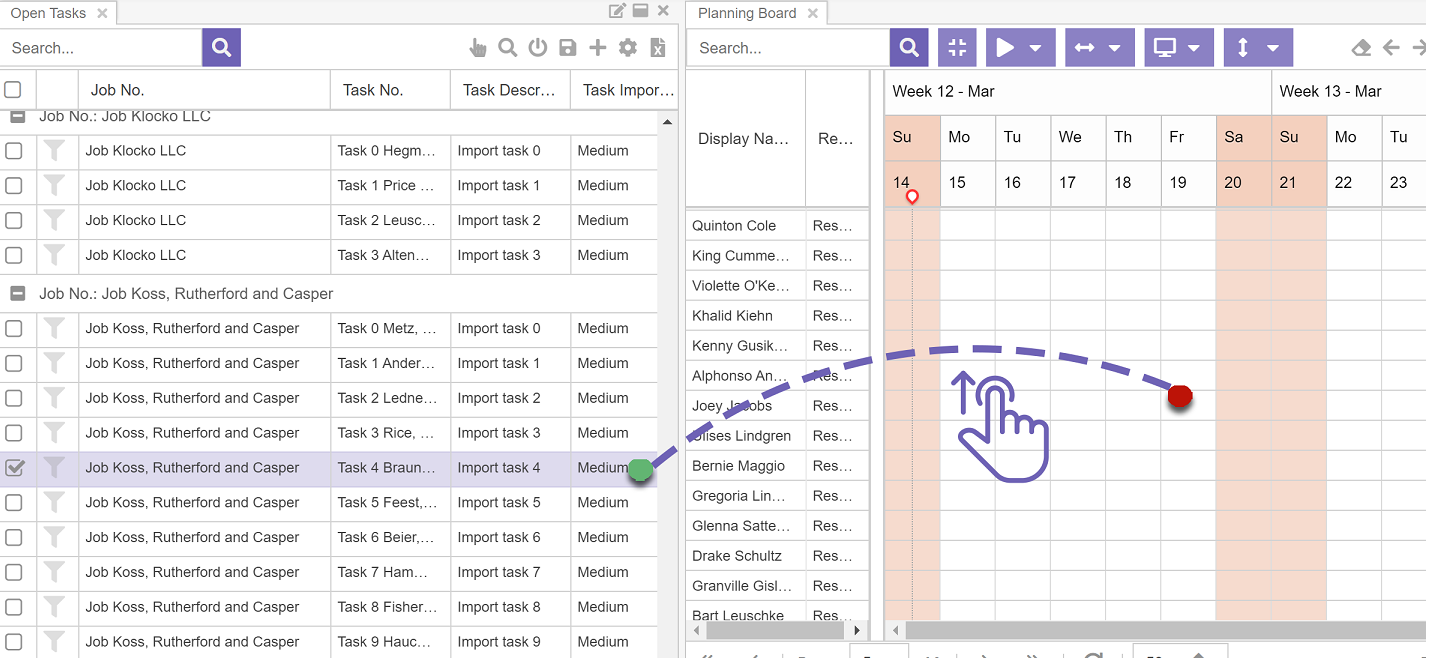
Planning a task is a single gesture: drag a row, drop it on a time slot on the planning board, release. The drop position fixes two things at once, the resource (which row you drop on) and the time (where on the row), and those two together are everything an appointment needs.
The gesture scales. Select several rows (the row checkbox, CTRL-click, SHIFT-click, or the header checkbox for the whole page) and drop them as a group. By default the tasks line up consecutively on the same resource; hold CTRL while dropping and they go on simultaneously instead, which is what you want when several resources do the same work at the same time.
Containers extend the gesture further. A task containerContainerA grouping mechanism that bundles related tasks or appointments so planners can move and manage them together. bundles related tasks (a classic example is loading a lorry at the depot and unloading it at the customer site), so planning any task in a container automatically plans every other task in it. The planner does not have to remember the relationship; the data does. When the situation calls for ignoring the container for once, hold SHIFT before you start dragging to plan only the task in hand.
How the component helps you decide
A drop on the wrong resource is still a drop, so the component does what it can to make the right decision the easy one.
Tasks arrive carrying filter valuesFilter valueA single value inside a filter group, used as a qualification on a resource or a requirement on a task. from the back office: skills required, regions covered, departments involved. The filter icon next to a row turns those values into a one-click resource filter on the planning board.

Click it and the board narrows down to the resources eligible for the work. If a resource filter component is on the workspace, it picks up the same values automatically. When a filter is active, the clear-filter button turns red so the state stays visible:
Some constraints come from the back office and are stricter than a hint. Time windows are enforced when the application is configured to do so: drop outside the allowed window and the planning is rejected outright.
![]()
Requested dates go further still. When the feature is enabled globally, the requested date overrules the planner's drop position, so an agreed commitment with a customer stays intact without anyone having to remember it. Requested times work the same way for the hours of the day, leaving the date flexible. The pattern is the same in both: the back office encodes a promise; the grid carries it through to the schedule.
Side actions
The row's context menu also offers a couple of jumps that are not about planning at all, but about reaching the data behind a task:
- Task links and action URIs open the document, the web page, or the back-office record the task points to. Static URLs and dynamic action URIsAction URIA dynamic link, populated with fields from a task, job or appointment, that opens an external system in one click. (links with placeholders that the system fills in from the task data) both appear in the same submenu.
- Open project loads the project that owns the task into the Gantt chart. Only active for project tasks.


Reference
Because the grid hands every row to drag-and-drop by default, copying cell text needs an explicit mode switch on the toolbar. See Copy data on the grid reference for how it works.
| Shortcut | What it does |
|---|---|
CTRL + drop | Plans the selected tasks simultaneously on the resource, not consecutively |
SHIFT + drag | Ignores task containers for this drag, so only the task in hand gets planned |