Planning board
The planning boardPlanning boardThe main graphical scheduling surface where dispatchers drag tasks onto resources across a timeline. is the heart of the application. It is divided into four functional areas:
- The scheduling grid
- The resource grid
- The top bar
- The bottom bar
You can spot each area at a glance:
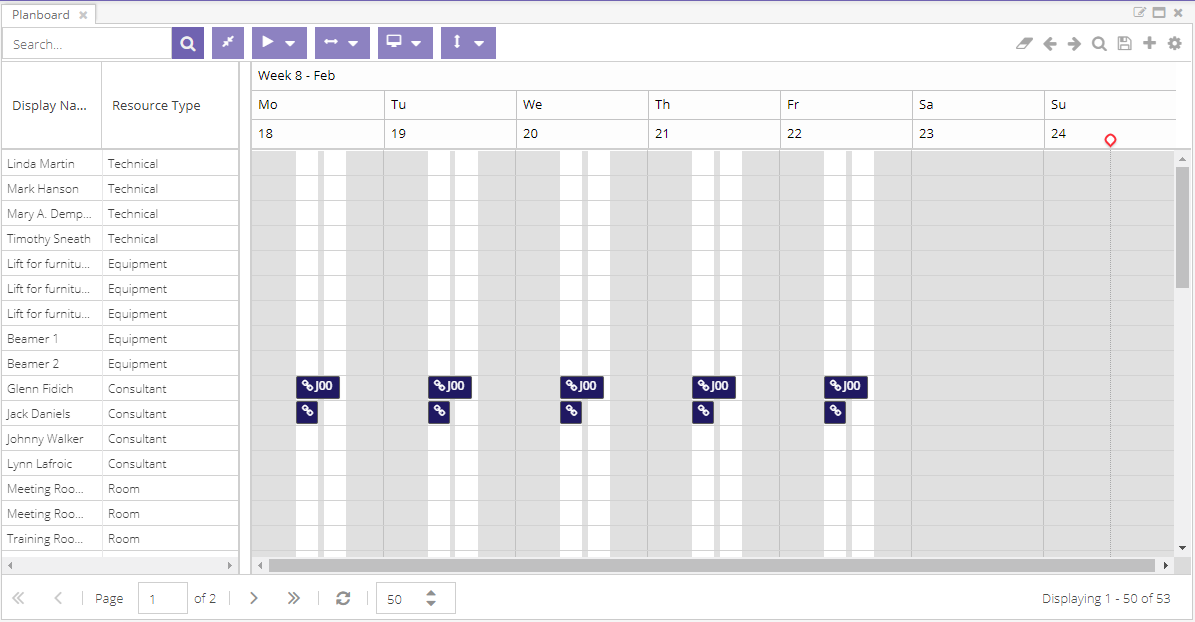
- 1Top bar. Search, view modes, zoom and the action buttons that drive the board.
- 2Resource grid. The resources you schedule, in a sortable, filterable grid. Each row owns the timeline to its right.
- 3Scheduling grid. Each resource's timeline. Drag tasks here to create appointments, then move or resize them in place.
- 4Bottom bar. Page through resources and manage the view state of the board.
At the center is a paged grid that holds all the resourceResourceAn entity that can carry out work - a person, vehicle, tool, or room - that you schedule on the planning board. information. Planners use it to filter, sort and visualize everything they need. Each resource in the grid also has its own planning timeline, which shows the appointmentsAppointmentA task scheduled to a resource for a specific period - the scheduled instance you see on the planning board. the user is authorized to access. Planners create, update and delete appointments in this timeline, either directly or indirectly. The top and bottom bars round out the component with extra features for navigation and state management.
The pages below describe each of these elements in detail.
Toolbars
Capabilities exposed in the tool bars.
Working with appointments
Capabilities exposed in the bottom bar.
Context menu
The planning board component is at the heart of the application.
Tooltips
Customize what appears in planning board appointment tooltips with a drag-and-drop builder.
Features
3 items
Shortcut keys
| Shortcut key | Action |
|---|---|
| DELETE | Delete appointment |
| CTRL + X | Cut appointment |
| CTRL + C | Copy appointment |
| CTRL + V | Paste appointment |
| SHIFT + D | Special paste: keep date |
| SHIFT + R | Special paste: keep resource |
| SHIFT + T | Special paste: keep time |
| SHIFT + L | Special paste: keep resource and time |
| SHIFT + 1 | Split: remove resource from appointment |
| SHIFT + 2 | Split: disconnect assignment |
| SHIFT + 3 | Split: split appointment |
| SHIFT + Drag appointment to other resource | Append resource |
| CTRL + Drag | Bulk select appointments |
| SHIFT + Arrow left | Move to the next period |
| SHIFT + Arrow right | Move to the previous period |
| SHIFT + G | Create an appointment container |
| L | Open the links associated to the selected appointment |