Map
The map plots jobsJobA high-level container, comparable to a project, that bundles related tasks together with common information such as customer, billing, and address., tasksTaskA unit of work that belongs to a job. It appears in the open task list until it is scheduled to a resource., appointmentsAppointmentA task scheduled to a resource for a specific period - the scheduled instance you see on the planning board. and resourcesResourceAn entity that can carry out work - a person, vehicle, tool, or room - that you schedule on the planning board. on a geographic surface. A grid is great for "who, when, what", but blind to the most important variable for any planner who sends people on the road: where. The map adds that variable and quietly turns the rest of the planning view into a logistics tool.
Without it, the planner picking a resource for a customer site has to guess who's nearest, and the planner sequencing a day of stops has to keep the geography in their head. With it, the same decisions are visible at a glance, and Dime.Scheduler can compute distance, travel time, and route lines on top.
What appears on the map
The map listens to the rest of the workspace: select an entity anywhere (open/planned tasks, planning board, Gantt, route sequence) and its location, if available, shows up here as a pin. Select several and you get several pins, with the zoom adjusted to fit them all. You can even select across components, useful when the planner is weighing whether a resource handling a planned task could also take an open task nearby.
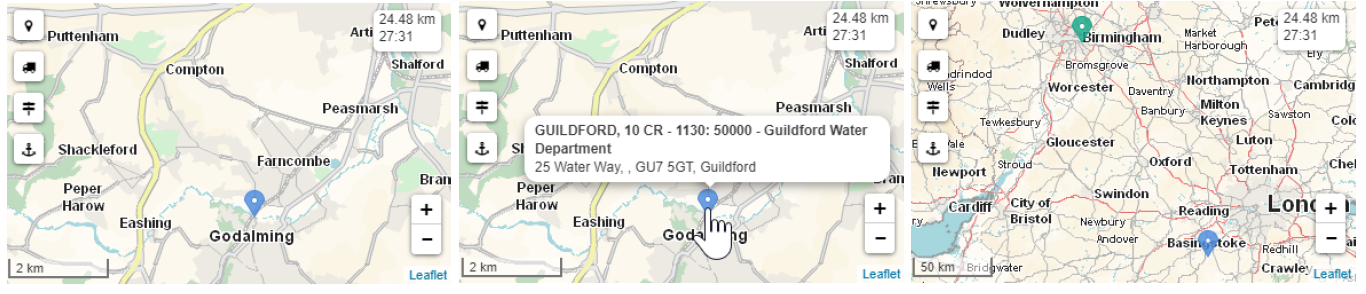
The pin a record gets depends on the entity behind it.
Jobs
Jobs hold the address that drives every task and appointment they spawn. Any appointment or task backed by a job with a valid address is a candidate for the map; anything without coordinates is silently skipped. See Geocoding for what it takes to give an address coordinates.
Resources
Resources can carry two locations at once:
- A home address, which marks HQ or where the resource starts the day.
- An actual or current address, fed by an external tracking system or by the mobile app.
When live tracking is active, the actual location shifts as the resource moves 1. An urgent service call comes in; the planner checks the map and dispatches the resource that's already five minutes away instead of the one back at the depot. Without that view, the same decision is a phone call and a guess.
Any system can post resource locations through our API, directly or via back-office systems such as BC/NAV. The mobile app does it out of the box.
A toggle on the map switches between resource home addresses and live locations, or hides resources from the map entirely. Switching modes clears the current resource markers and renders the other set; routes that involve resources are cleared too, since their geometry no longer applies.
Hover any pin to see a tooltip with the resource's display name. To leave the names permanently visible, use the "Sticky popup" icon in the upper-left corner.
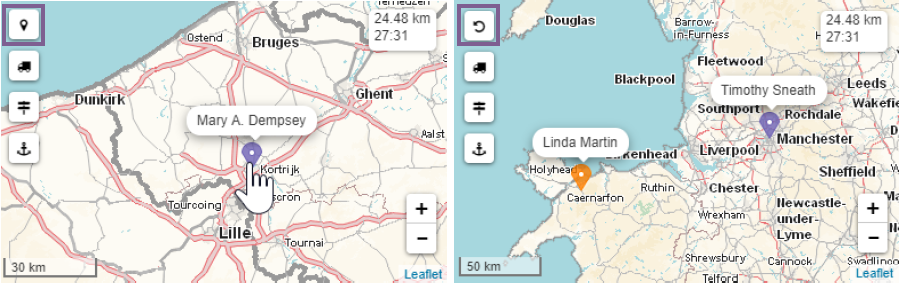
When nothing else is selected and the planner clicks a resource on the planning board, the map navigates and zooms to that resource automatically.
Marker colors
Pins are color-coded so the eye can group at a glance:
- Blue for open tasks
- Green for planned tasks and appointments
- Purple for resources
The back office can override these defaults via the pin indicator, which is how teams give each vehicle type, order priority, or skill set its own color scheme. Useful when the planner has dozens of pins on the screen and needs to tell categories apart without hovering.
Routing
Pins are the start of the story; routes are why the map earns its keep. Dime.Scheduler computes the road between the selected stops, with distance and travel time, by handing the geometry off to PTV Group, a long-standing routing engine.

Route profiles
Real-world routing isn't one-size-fits-all. A 38-ton truck cannot take the same line as a delivery van; an emergency vehicle has options a passenger car does not; a bicycle has its own set of allowable streets. Route profiles are the presets that tell the routing engine which parameters to use: vehicle type, weight, dimensions, tunnel restrictions, low-emission zones, load type, and a long tail of others.
PTV ships a standard set to start from (Default, Fast car, Slow car, Delivery, Emergency, Fast truck, Slow truck, Bicycle, Pedestrian) and Dime.Scheduler lets you customize beyond that. The active profile is picked up from the user profile first, falling back to the global application setting. Set it per planner where the work demands it; set it globally where one profile fits the whole team.
Automatic and manual routes
With automatic route calculation on, the route redraws every time the planner selects a new task or appointment, in the order it was selected. With it off, the planner clicks the pins one by one to compose the route deliberately, or uses bulk select to grab a region.
Turn on the route-sequence view (globally or per profile) to render the order as numbers in each pin. Manage that order in the route sequence component, which doubles as a list view of the same trip.
Clear a route with the route button , or by deselecting the tasks and appointments that built it; the pins go away and the route with them.
Optimizing the round trip
The round-trip optimizer is currently in preview. Functionality and behavior may change between releases. Not recommended for production yet.
A daily route for a resource is the classic Traveling Salesman Problem: start at home, visit every stop, finish back at home, minimize total time. Dime.Scheduler treats this as a first-class concept (a round trip) with the resource's home/actual address as the fixed start and end, and the waypoints in between as the variable.
To create one, select a cell on the planning board and press R (or right-click and choose Show daily route). The map renders the trip; the route sequence grid lists the stops with cumulative travel and working time.
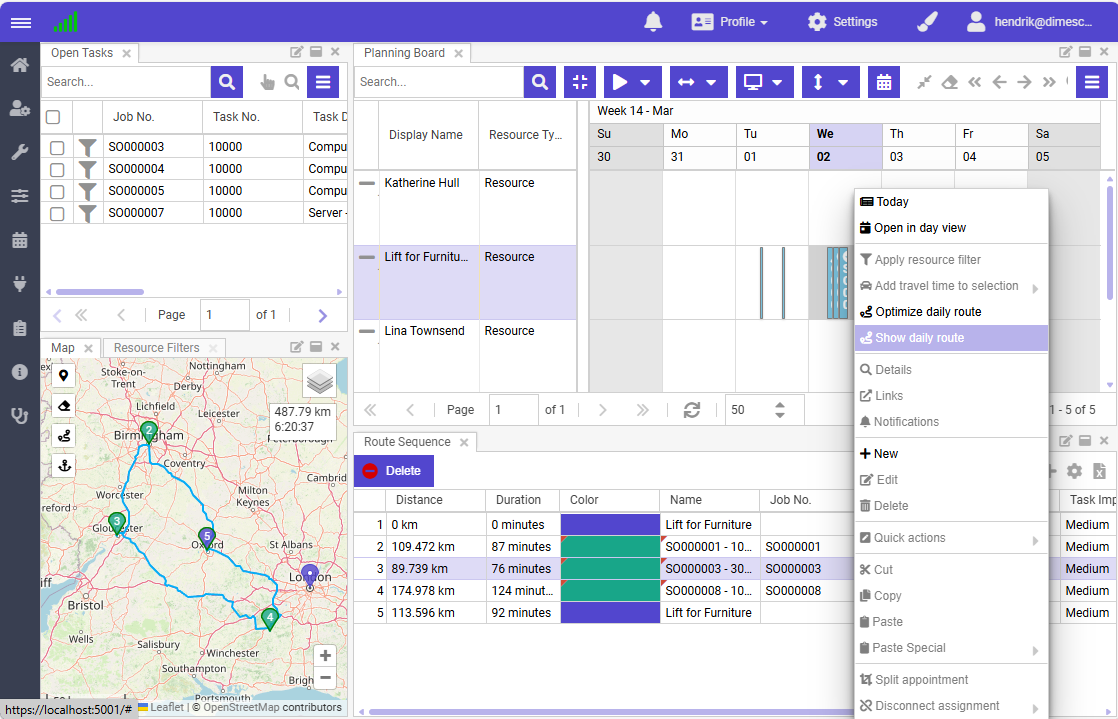
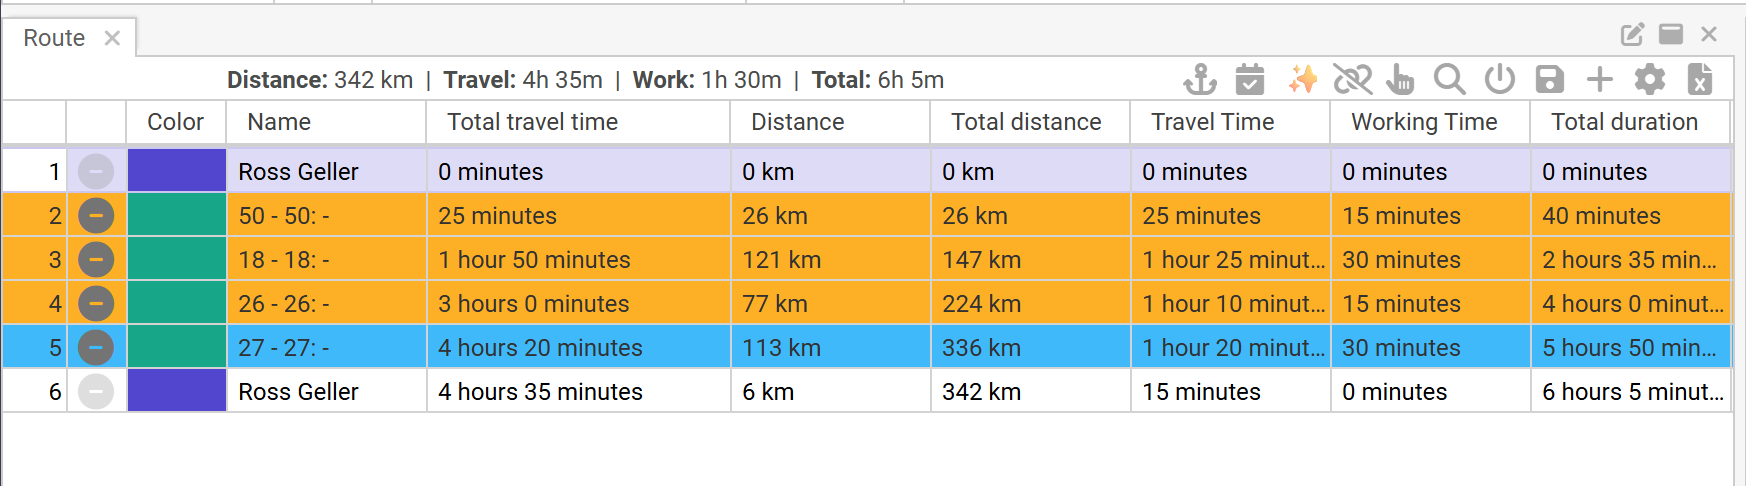
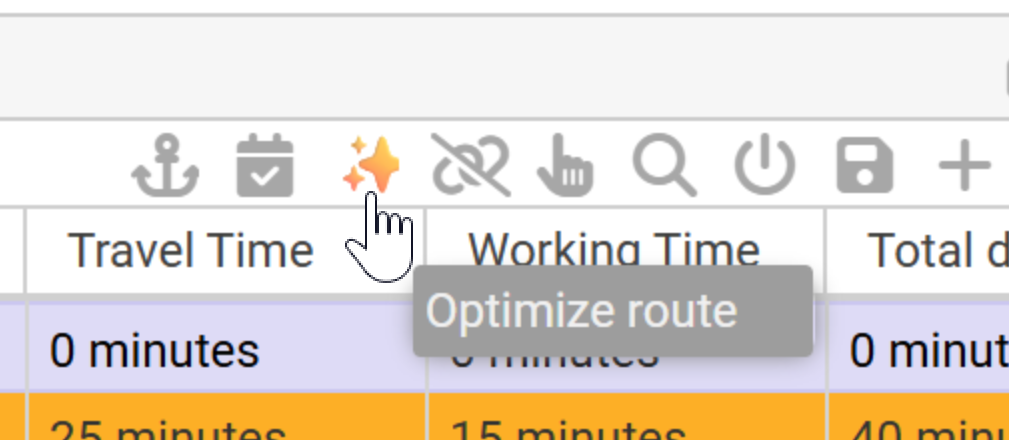
Hand the trip to the optimizer with the sparkle button, available when Route optimization is enabled in preview features and the tenant has the Advanced map add-on. The solver returns a new order that minimizes travel time and distance; the route on the map and in the grid update in place. Optimizing alone does not write back to the planning, so the planner can experiment freely.
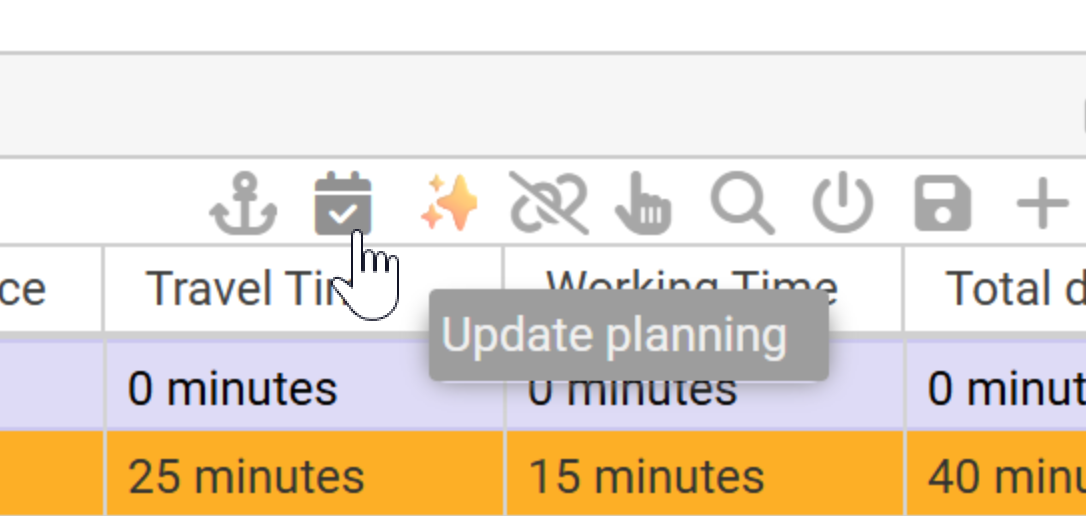
Add more appointments to the round trip, pull in open tasks, reoptimize. When the daily route is right, confirm it to push the new order to the planning board.
Selecting in bulk
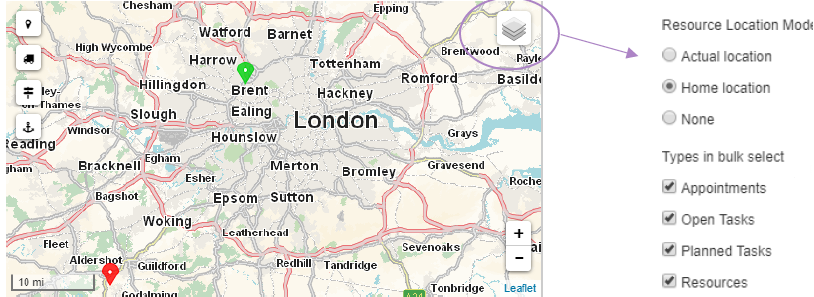
Picking pins one by one is fine for a few stops and tedious for a planning region. Bulk select lets you grab everything inside an area with SHIFT + drag (which also zooms to the area) or SHIFT + CTRL + drag (same selection, no zoom).
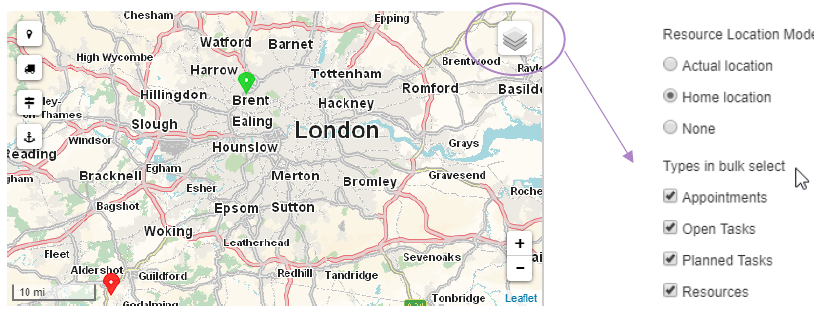
A small filter on the map decides which marker types are eligible: open tasks, planned tasks, resources, appointments. All four are on by default, but it pays to narrow them when the planner only wants resources or only wants tasks. The setting lives in the browser's local storage, so it carries across profiles.
Following task containers
A task containerContainerA grouping mechanism that bundles related tasks or appointments so planners can move and manage them together. bundles related tasks. The map respects that bundle: select one task from a container in the open tasks grid and every other geocoded task in the same container shows up on the map automatically. Most useful in scenarios with built-in dependencies (a load task at the depot plus the unload task at the customer), where seeing the geographic spread of the bundle helps the planner spot inefficient pairings before they're committed.
State
The map stores its settings in the browser's local storage, not the user profile, so they apply across profiles on the same machine:
- Sticky popups on/off
- Show traffic
- Show truck attributes
- Resource location mode (home vs actual)
- Bulk select marker types
Shortcut keys
| Shortcut | What it does |
|---|---|
SHIFT + drag mouse | Bulk-select markers in the dragged area and zoom to it |
CTRL + SHIFT + drag mouse | Bulk-select markers in the dragged area without zooming |