Resources
A resourceResourceAn entity that can carry out work - a person, vehicle, tool, or room - that you schedule on the planning board. is anything a planner can assign work to: a person, a vehicle, a piece of equipment, a meeting room. Resources are the master data of planning - every appointment on the planning board exists because a planner put it on a specific resource at a specific time.
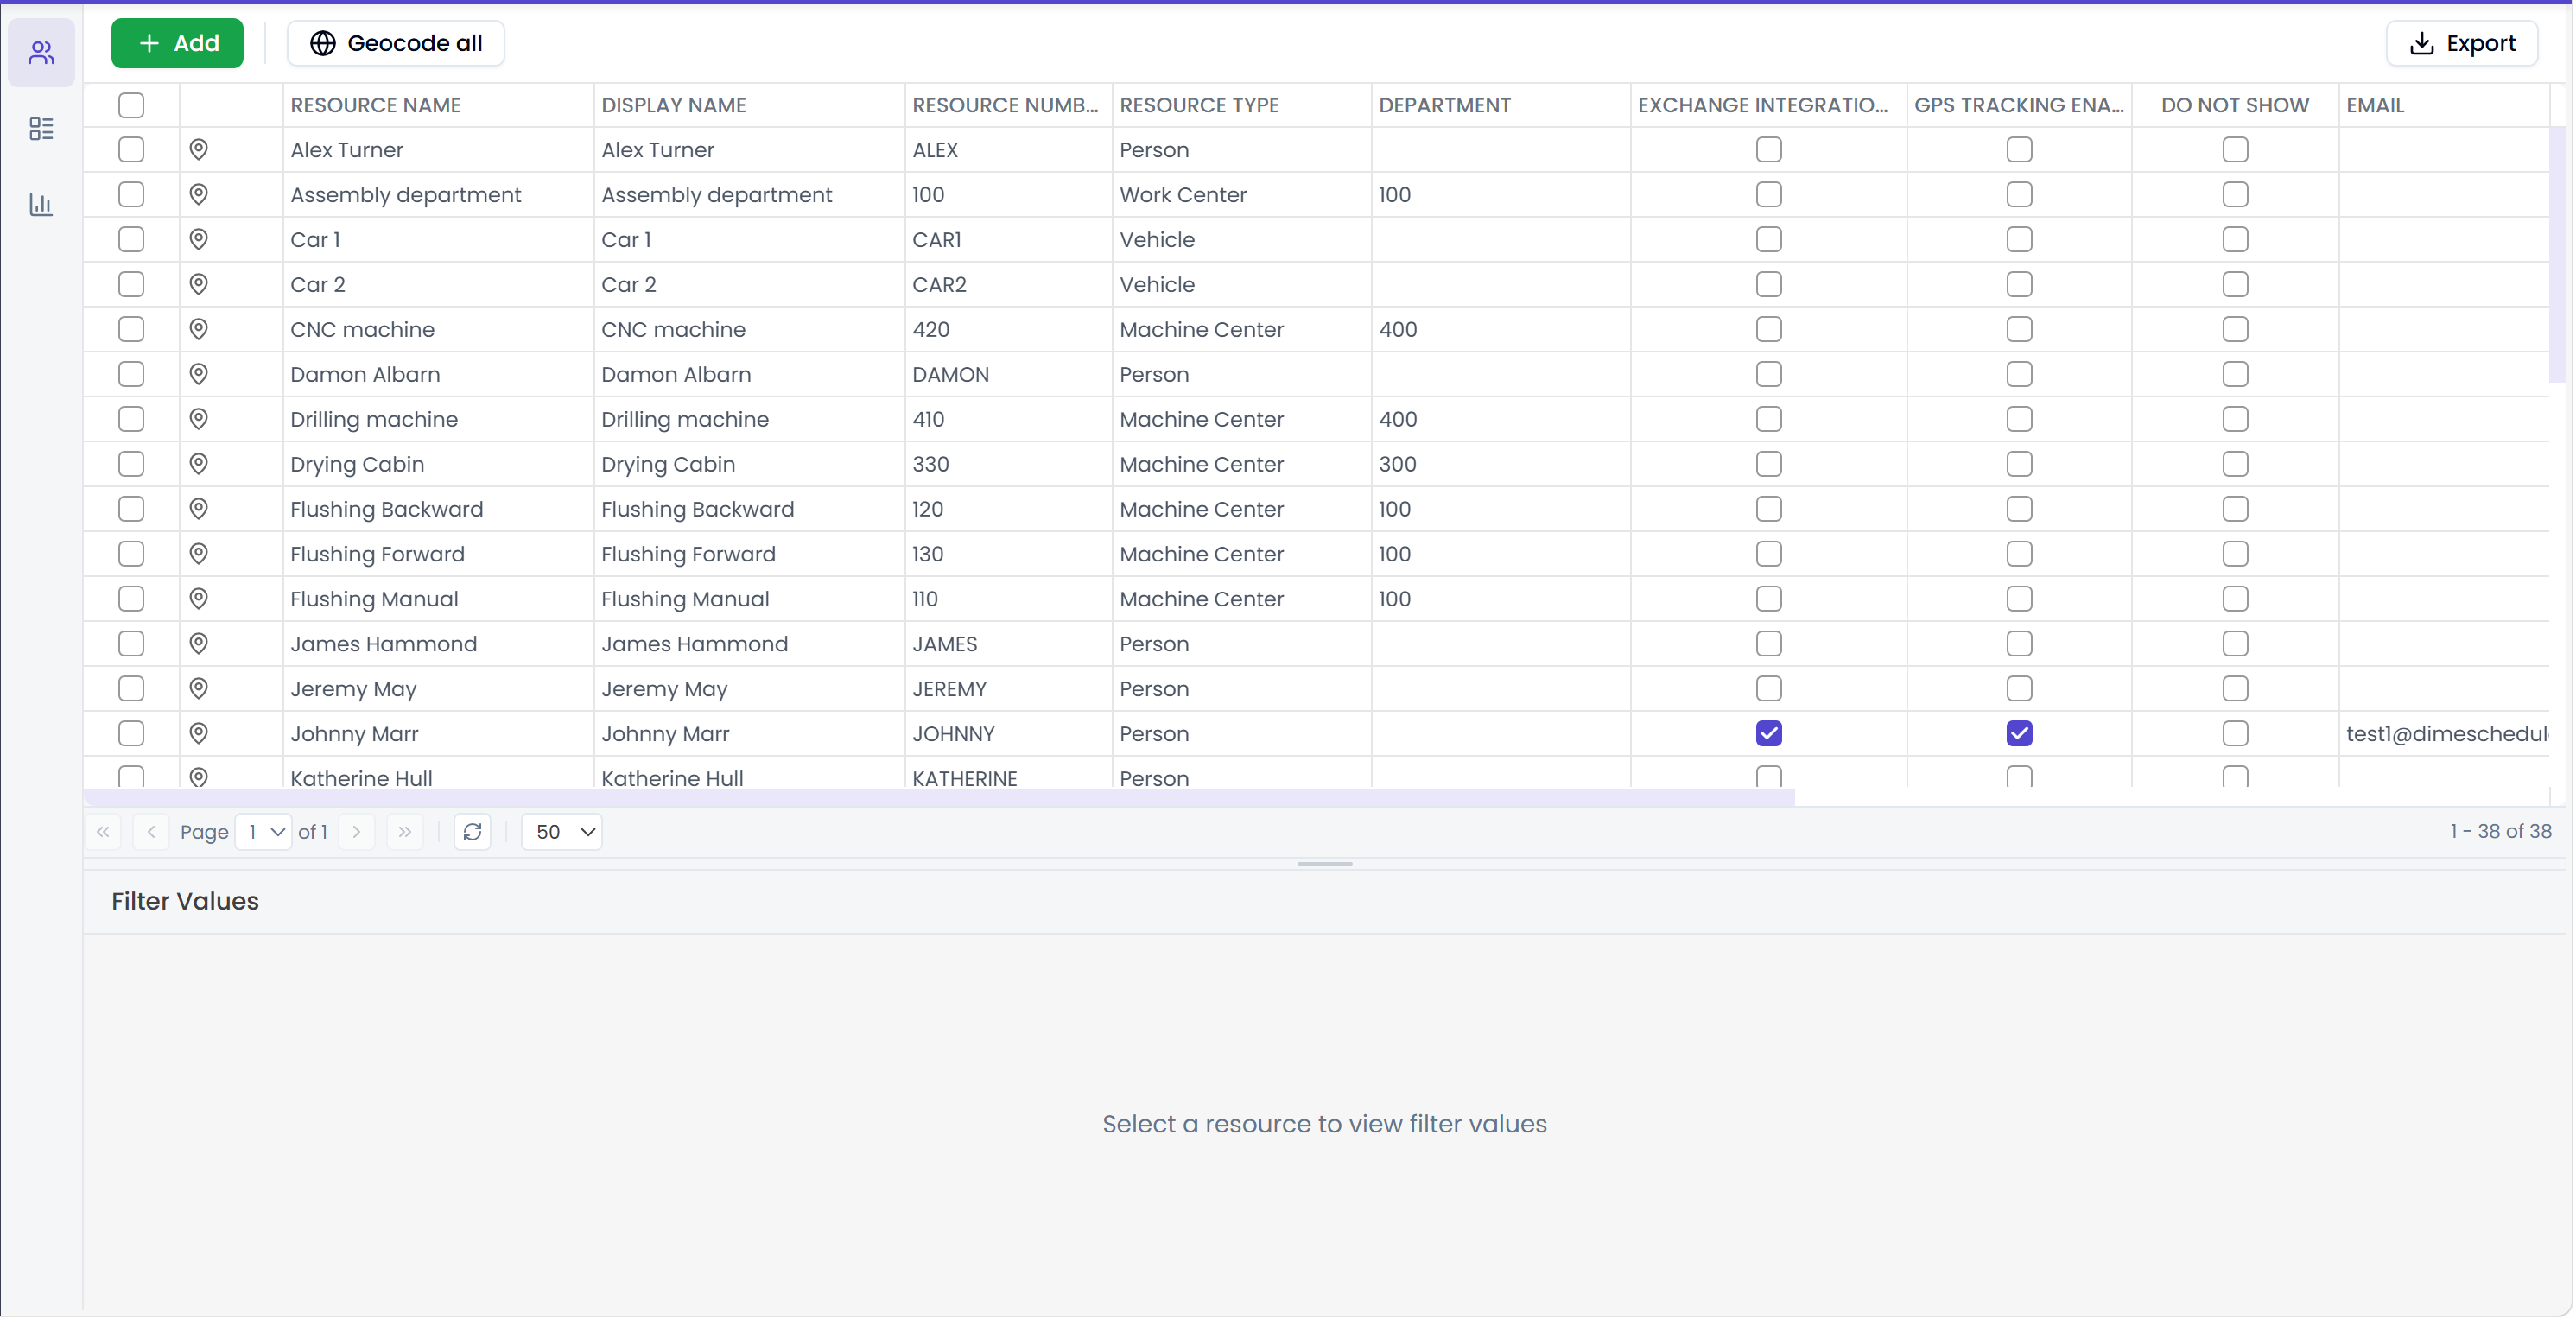
This page is where you tell Dime.Scheduler which resources exist, who they are, and what makes each one special. Most of what you configure here is straightforward bookkeeping (names, addresses, contact details), but a handful of columns change how the resource behaves on the planning board, on the map, and against your license.
Where resources come from
In most setups, the back-office application (your ERP, your CRM, a HR system) is the source of truth for resources. The connector synchronises them into Dime.Scheduler so planners can assign work without you maintaining a parallel list.
You can still add, update, or remove resources directly from this page, but keep one thing in mind: the back office is the master. If you rename a resource here and the back office sends an update tomorrow, the back office wins. Direct edits inside Dime.Scheduler are best treated as quick fixes between syncs, not as the long-term home of resource master data.
The link between the two systems is the resource number. It is the identifier that matches a resource in Dime.Scheduler to its counterpart in the back office. It looks like a technical detail, but it is the entire integration in a single field - get it wrong and updates stop flowing.
What you can configure
The grid has more columns than you typically need to think about. Free dates, free decimals, free text fields are open for you to use however your processes require, and they pair well with proprietary logic enforced in the back office. Other columns capture the resource's address (used by the map) or its team and department membership.
A handful of columns deserve a closer look because they do not just store data - they change what the resource can do.
Resource type
The resource type groups resources into logical units and unlocks planning rules. For example, a resource type can prevent a planner from assigning more than one resource of that type to the same job - useful when "only one driver per truck" is a real constraint, not a suggestion.
GPS tracking and Exchange integration
Two flags turn on optional integrations for the resource:
- GPS trackingGPS trackingLive location tracking of mobile resources, shown on the map so planners can dispatch the nearest available person. lets the planner follow the resource's live location on the map, provided a system feeds that data into the back office.
- Exchange integration synchronises Dime.Scheduler appointmentsAppointmentA task scheduled to a resource for a specific period - the scheduled instance you see on the planning board. with the resource's Exchange inbox, so assignmentsAssignmentThe link between an appointment and a resource. An appointment can carry several assignments when more than one resource works on it. show up in the resource's calendar automatically.
Both are licensed features, which leads to the next point.
How the license affects what you can change
Dime.Scheduler watches the GPS tracking, Exchange integration, and Do Not Show flags as you edit. Switching one on triggers a license re-evaluation, and the change is rejected if it would push you past your license threshold. You can still edit the rest of the resource, you just cannot flip that specific flag until you free up capacity (typically by disabling the flag on a different resource first).
The Do Not Show field hides a resource from the planning board entirely. No filter or sidebar setting brings it back until you clear the checkbox - which is intentional, because the flag is also how you exclude a decommissioned resource from license counts without deleting its history.
Pin
By default, resources show a purple pin on the map. The Pin column lets you assign a pin indicator instead, overriding the default whenever the resource is selected.
Putting resources on the map
Use the geocode button on a row, or the Geocode All button at the top, to resolve the coordinates of a resource's home address. After a refresh, geocoded resources appear on the map. Resources are also geocoded automatically once a day in the background, so the manual button is mostly for the first import or when you fix an address.
Full details are in the geocoding documentation.
Mobile users need a matching email
When a resource will be used by someone logging into the mobile app, populate the resource's email address field correctly. The email is what links the user account to the resource: when the user logs in, Dime.Scheduler looks up the resource with the matching email and shows that resource's appointments.
The match has to be exact. If a mobile user reports an empty agenda, this is the first thing to check.
Make sure to:
- Keep email addresses synchronised between users and resources
- Use valid, active email addresses for resources that will be accessed via mobile
- Verify the email address match if a mobile user reports not seeing their assignments
For setting up the user account itself, see the Users documentation.
Reference
Shortcut keys
| Shortcut key | Action | Remark |
|---|---|---|
| DELETE | Deletes the selected records. Is the equivalent of the delete button. | Only when a delete button is present |
| CTRL + click on group | Collapses the other groups in the grid | Only possible when grouping is set |