Installing the Zapier Connector
The Zapier connector links Dime.Scheduler to 8000+ apps, so scheduling data can flow in and out automatically. This page walks you through finding the connector, authenticating it, and building your first Zap.
Step 1: Find the Connector
The Dime.Scheduler connector is publicly available on Zapier:
- Log in to your Zapier account at zapier.com
- Search for "Dime.Scheduler" in the app directory or when creating a Zap
- The connector is ready to use, with no invitation needed.
You can find the connector at zapier.com/apps/dime-scheduler/integrations or search for it directly when building Zaps.
Step 2: Create Your First Zap
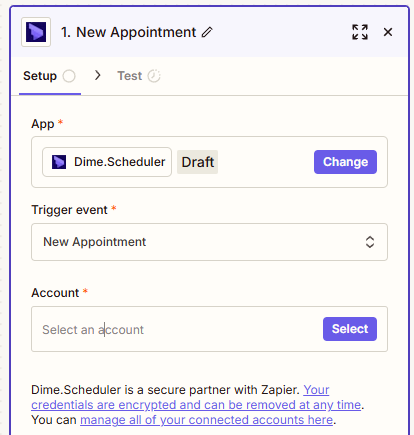
With access in place, build your first Zap:
- Navigate to Zapier and click "Create Zap"
- Choose a trigger from any app you want to connect with Dime.Scheduler
- Add an action and search for "Dime.Scheduler". Pick the action you want to run: create/update an item, set an attribute of entities such as tasks and appointments, or remove an item. For example, you could create a category to organize tasks:
Step 3: Configure Authentication
The first time you use the connector, Zapier prompts you to sign in:

Authentication Details
Provide the following credentials:
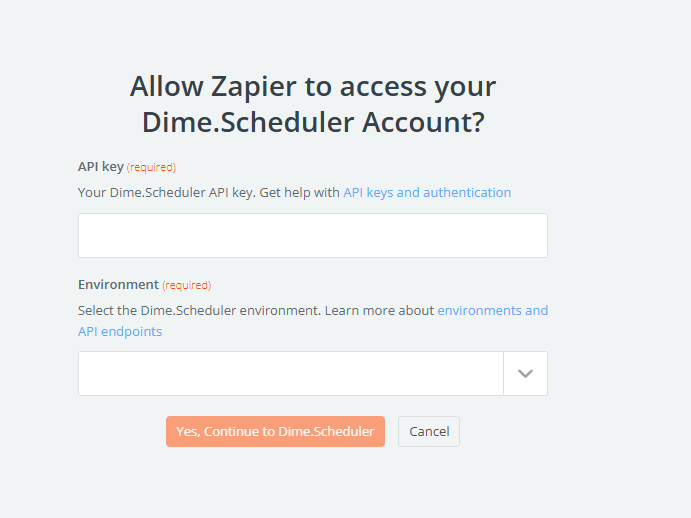
| Field | Description | Example |
|---|---|---|
| API Key | Your Dime.Scheduler Connect API key | abc123xyz789... |
| Environment | Choose between Sandbox or Production | sandbox or production |
You can obtain your API key from the Dime.Scheduler administration panel under Administration → API Keys. For more information, see the API Keys documentation.
Choose Your Environment
The connector supports two environments:
Sandbox Environment
- Purpose: Testing and development
- Use Cases:
- Testing new Zaps before going live
- Development and experimentation
- Training and demos
- POC/pilot projects
Production Environment
- Purpose: Live operations
- Use Cases:
- Real business operations
- Live customer data
- Production integrations
Always develop and test your Zaps in Sandbox before deploying to Production. This protects your live data and allows you to refine your workflows without risk.
Once you submit your credentials, the authentication window closes and you can continue building your Zap.
Step 4: Configure Your Action
After authentication, configure the action you want to perform:
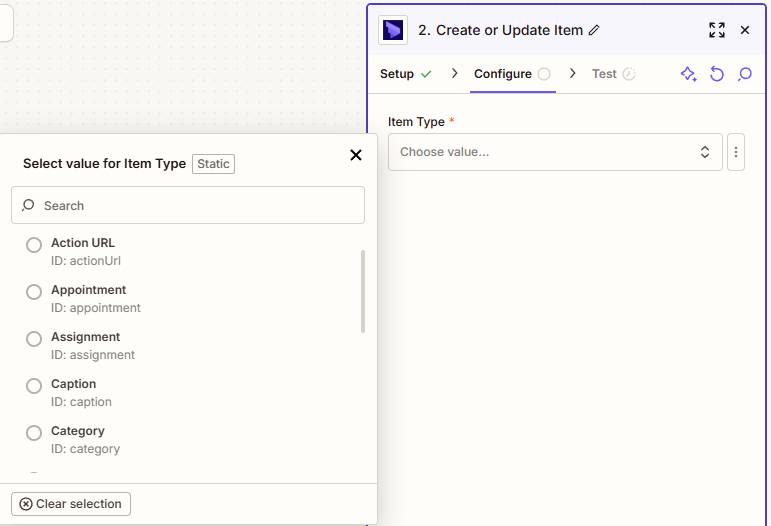
- Select the item type (e.g., Category, Task, Appointment, Resource)
- Map the fields from your trigger to the Dime.Scheduler fields
- Test your action to ensure it works correctly

Step 5: Enable and Test Your Zap
- Test your Zap by clicking the "Test" button
- Review the results to ensure data is flowing correctly
- Enable your Zap to start automation
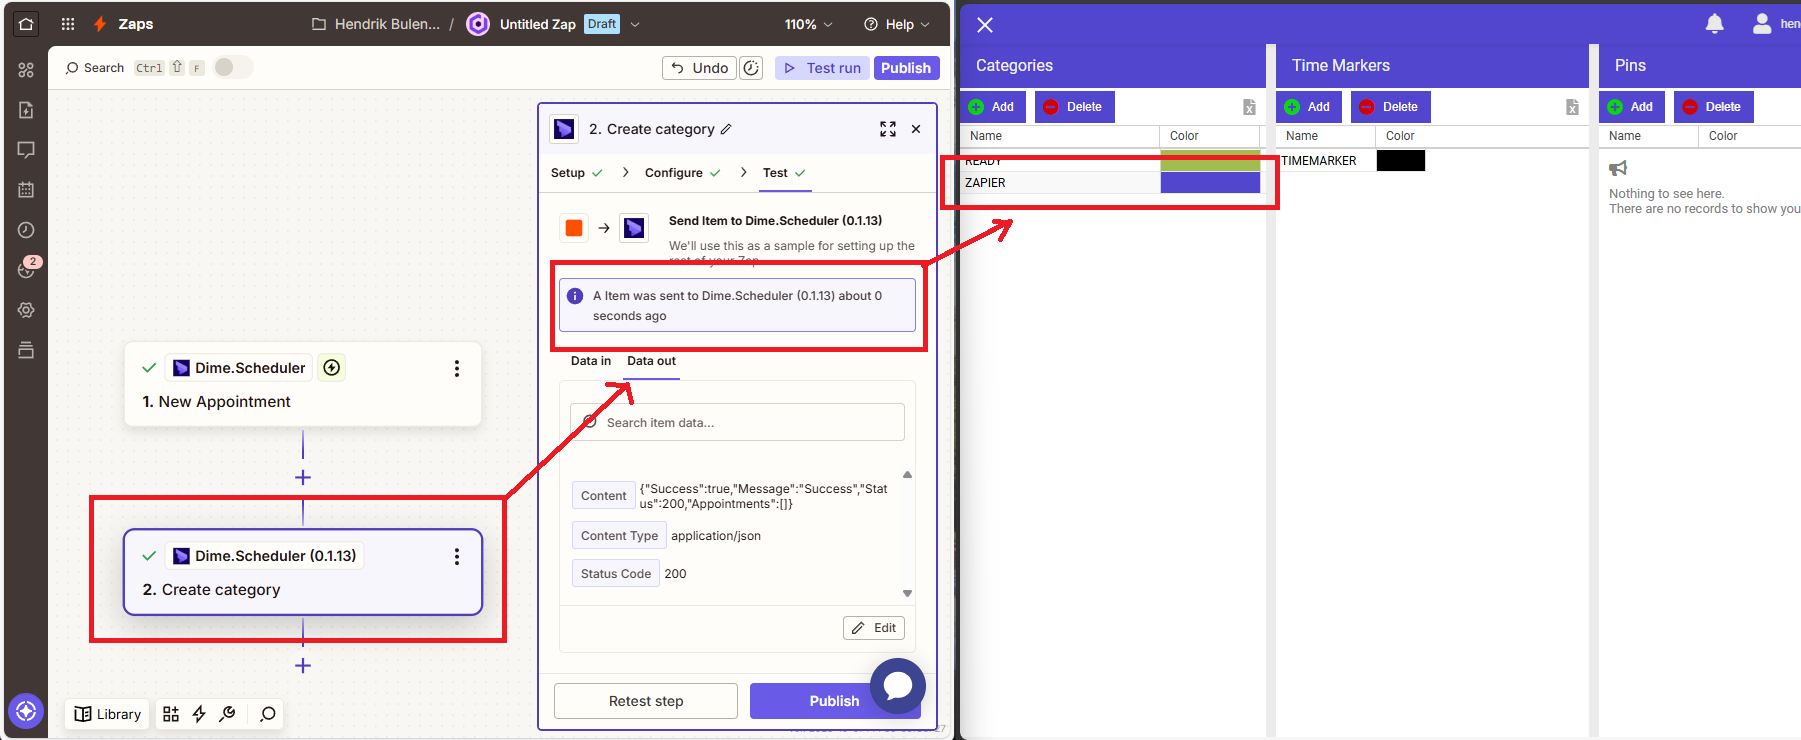
Your Zap is now live and will automatically sync data between your apps and Dime.Scheduler.
Need help? If you run into issues during setup, see the Troubleshooting guide for solutions.