Authentication
Microsoft Dynamics 365 Business Central on-premises
There are a few ways to authenticate to a BC instance:
- This guide walks you through the process of obtaining a web service access key.
- The traditional way is to use the user name and password of the service account that can access BC.
Dime.Scheduler supports two authentication protocols to establish a connection with BC:
- Basic authentication
- Windows (NTLM/Kerberos)
By default, Windows auth is used. To instruct Dime.Scheduler to use basic authentication, prepend basic= to the login field value.
Microsoft Dynamics 365 Business Central online
As of BC20, the OAuth2 authorization protocol must be used for SOAP and OData web services. To establish a connection with Dime.Scheduler, please follow the guidelines as instructed below. The official documentation provides additional information.
To enable service-to-service authentication, you'll have to do three things:
- Register an application in your Microsoft Entra ID tenant for authenticating API calls against Business Central.
- Grant access for that Microsoft Entra ID application in Business Central.
- Connector setup.
Create a Microsoft Entra ID application for authentication to Business Central
- Sign in to the Azure portal.
- Register an application for Business Central in Microsoft Entra ID tenant.
- Specify a name. For example: "Dime.Scheduler for Business Central"
- Select the supported account type
- Add the following Application API permissions to the app:
- Dynamics 365 Business Central:
app_access - Dynamics 365 Business Central:
API.ReadWrite.All
- Dynamics 365 Business Central:
- Grant admin consent to these permissions. When done, the permission set should look like this in the portal:

Set up the registered application in Business Central
After you create the application registration, the next task is to configure the Business Central tenant to use it. You'll need the following information about the application registration: application (client) ID, directory (tenant) ID and client secret.
- In the top-right corner, choose the search icon, enter Microsoft Entra Applications, and then choose the related link.
- Create a new application. In the modal window, provide the following information:
- Paste the Microsoft Entra ID App Client ID in the Client ID field
- Provide a description: "Dime.Scheduler"
- In the User Groups section, add
D365 Basic ISVto the relevant company. - In the User Permission Sets section, add the following permission sets:
- D365 Basic ISV
- Dime.Scheduler
- Local
- Optionally: any required permission set to access your custom objects
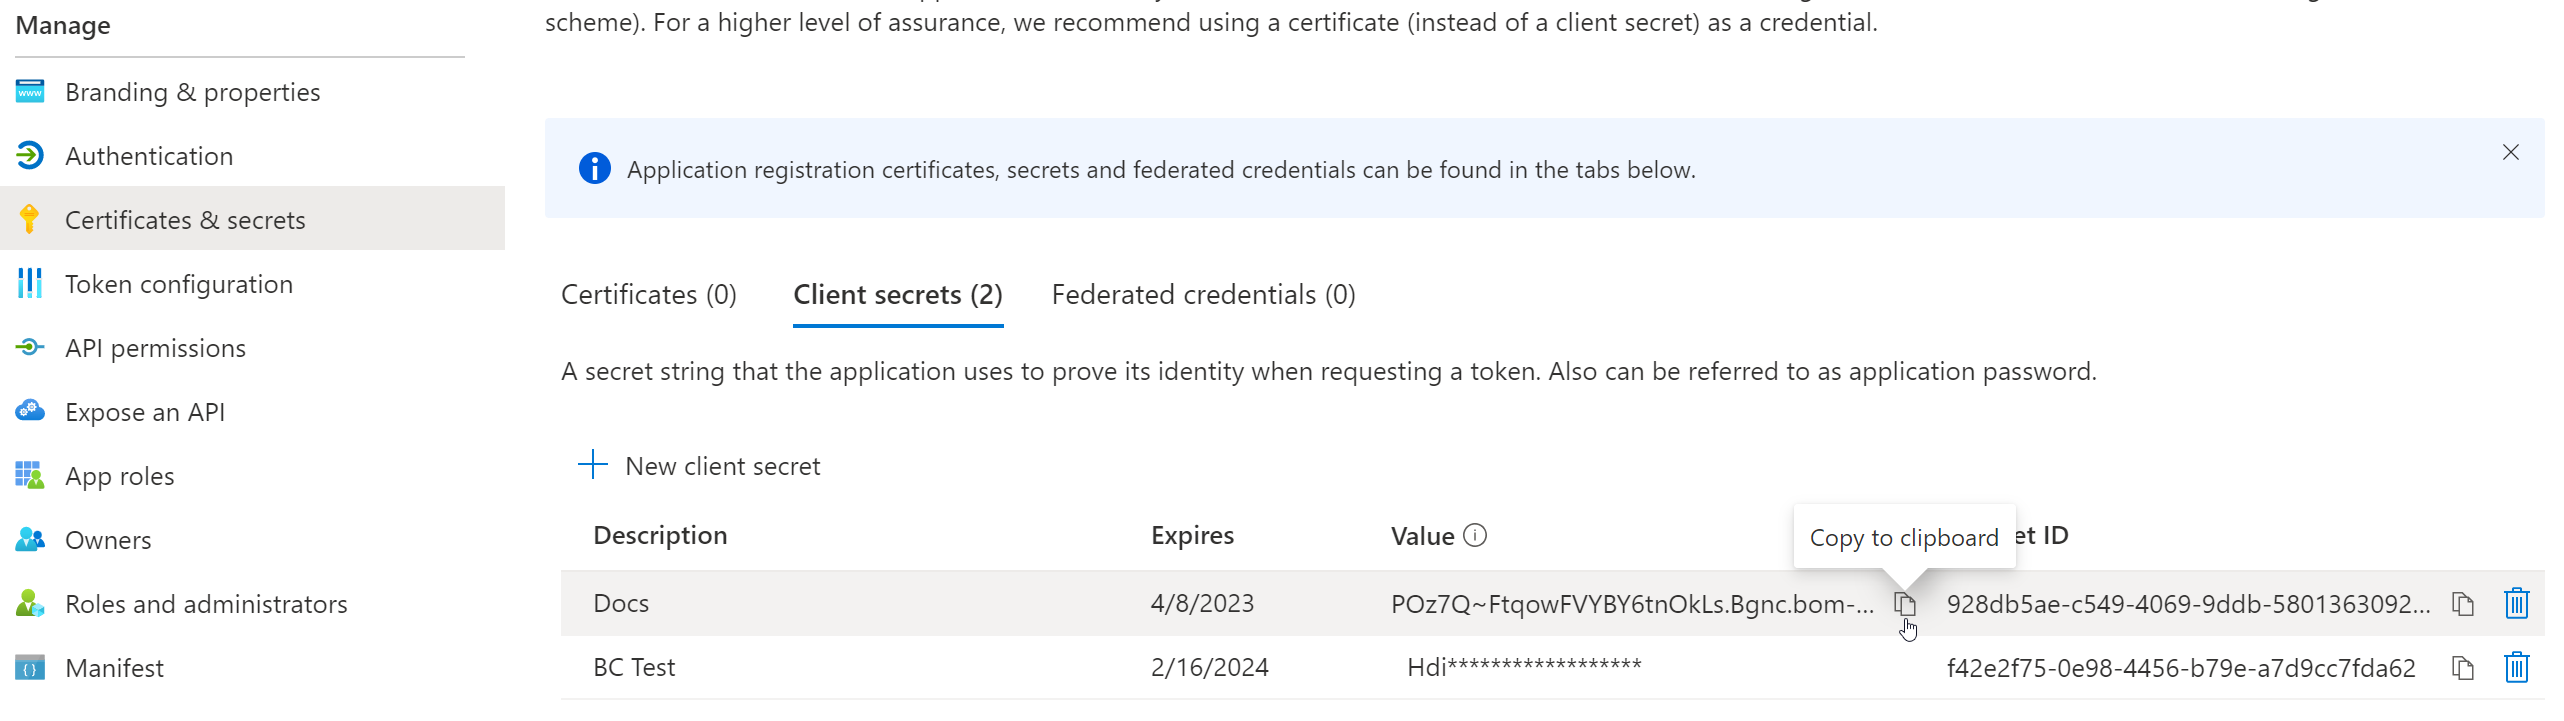
Setting up the connector
Back in the Microsoft Entra ID App, we need to create a client secret. Navigate to the 'Certificates & secrets' section of the app and click 'New client secret'. Fill out the details and copy the client secret:
The only remaining task is to create a connector in Dime.Scheduler for the BC SaaS/Online back office type.
- In the login field, use the Directory (tenant) ID.
- In the password field, take the following string and replace
CLIENTIDandCLIENTSECRETwith the corresponding values from the app registration:client_id=CLIENTID&client_secret=CLIENTSECRET
Save the record and you have successfully set up the connector for Microsoft Dynamics 365 Business Central Online.