Part 3: Tasks
In this part, you'll take the list of work in your Excel file and make it available in the open task list in Dime.Scheduler.
This is the third post in the guide on how to integrate Dime.Scheduler with Microsoft Excel through the Power Platform:
- Part 1: Setting up the connector
- Part 2: Resources
- Part 3: Tasks
- Part 4: Processing appointments
By the end of this post, you'll know how to:
- Use the job and task actions in the Power Platform connector
- Create and manage tasks in Dime.Scheduler
- Schedule tasks
Step 1: What constitutes a task
With your resources available for planning, it's time to give them some work. You can use manual appointments, but those usually fit ad-hoc and unstructured interventions, such as tentative appointments awaiting confirmation from the customer. Dime.Scheduler comes into its own when used together with other systems. As covered in earlier parts of this series, a simple Excel sheet provides the list of work that needs to be planned:
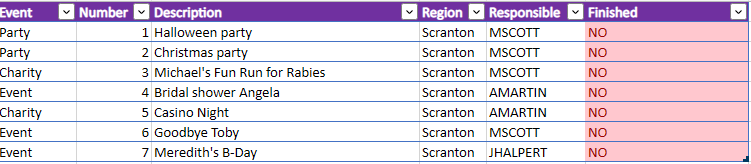
Much like a resource, a task can be anything: it's simply a piece of work that needs to be carried out. In this tutorial, we'll plan a number of events for the employees of the company Dunder Mifflin Inc. The plannable work in the Excel sheet above is as simple as it gets: a list of events that need to be planned. The 'Finished' column indicates whether an event has been planned yet. This is just a showcase, though. It's ultimately up to you to define what a task is, and you can make it as complex as you want.
Any system that can provide a list of work is eligible to connect to Dime.Scheduler. Any system that can make its data flow through the Dataverse can leverage our connector and add work to the list that needs to be scheduled.
The data model of a task in Dime.Scheduler is slightly different, as it has two levels: jobs and tasks. A job is the high-level entity, best compared to a project: it's a collection of activities (or tasks) that need to be completed to reach a certain outcome. Jobs bundle common information that applies to all underlying tasks, such as customer info, billing details, and address. For a complete overview of a job's properties, see the API reference.
A task, on the other hand, is the actual unit of work to carry out. A task always belongs to a job, and it uniquely identifies an item of work that appears in the open task list, and then in the planning board once scheduled. For a complete overview of a task's properties, see the API reference.
This data model gives you many ways to organize your work. For simplicity, we'll use a 1:1 relationship between jobs and tasks: for each task we'll create a new job. You may instead want to group tasks if you need to know how many hours your consultants have worked on a given project, or get a detailed report of how much budget is left on a fixed-budget project.
| Event field (Excel) | Field (Dime.Scheduler) | Type | Comment |
|---|---|---|---|
| Event + Number | JobNo | Job | The JobNo field serves as an external identifier that can be traced back to the job |
| Event + Number | TaskNo | Task | The TaskNo field serves as an external identifier that can be traced back to the task |
| Description | Description | Job/Task | |
| Region | Region | Job | |
| Responsible | Region | Job |
In this setup, concatenating Event + Number creates a unique identifier for the work item. For more complex projects with multiple tasks, the JobNo and TaskNo will almost always differ.
The next two steps are much like the previous part: you'll create a flow that is triggered manually, then invoke the right actions with the correct data mapping to send the data to Dime.Scheduler and start planning.
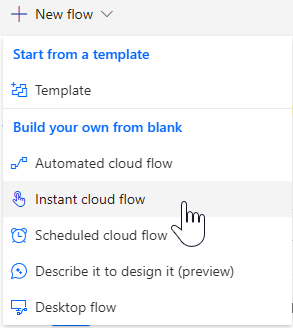
Step 3: Create a new flow
Create a new flow in Power Automate. To keep things simple, we'll trigger it manually:
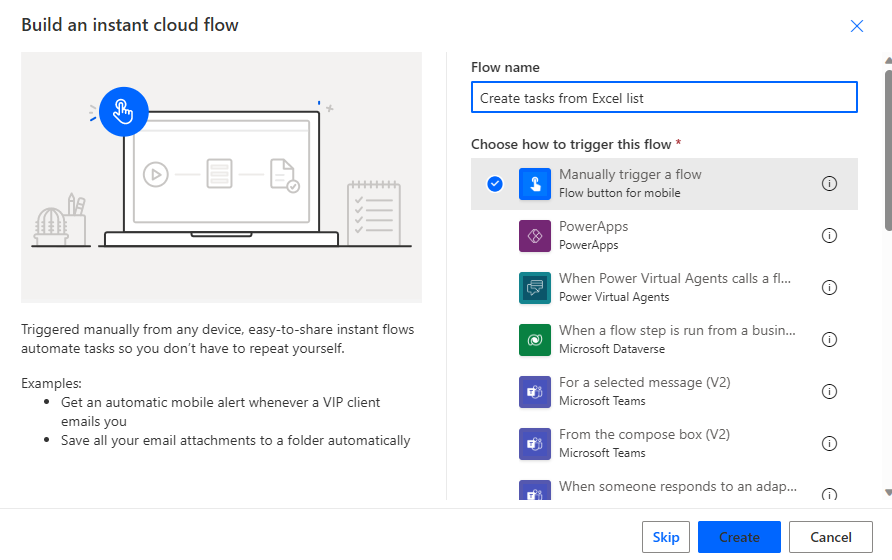
In the modal window, give the flow a name and select 'Manually trigger a flow':
The Flow builder opens with the trigger already added to the canvas.
Step 4: Looping through each record in the Excel sheet
One of the many advantages of storing the Excel file on Office 365 is that the Power Platform can not only access the file, but also read and update rows and columns. In our example, we want to send over the entire list in the 'Events' sheet. A few simple commands let us run an action against every item found.
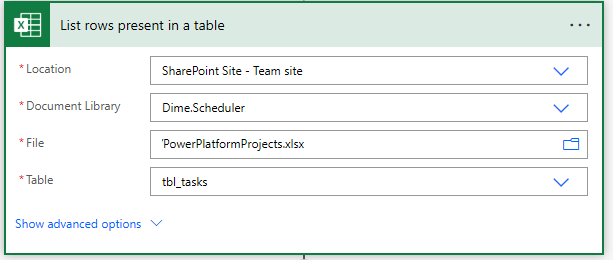
Add a step to the flow and look for the action 'List rows present in a table' in the Excel Online connector. This action is self-explanatory: tell it where to find the Excel file and which table to look for:
With the list in hand, iterate through each record in the table. The Power Platform has you covered with the 'Apply to each' action. For each record in the table, we want to add a task in Dime.Scheduler. Inside the 'Apply to each' section, add the following actions, in this order:
- Add, update or remove a job
- Add, update or remove a task
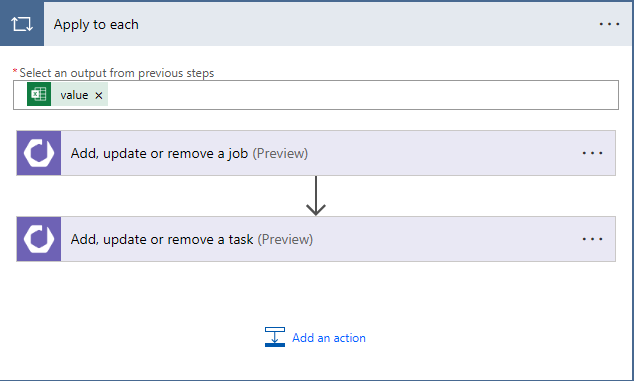
In the output field of the loop action, select value.
Step 5: Inserting tasks
When you expand either action, you'll find an extensive list of fields you can use to alter the behavior of Dime.Scheduler. To dig deeper, check out the Job API reference and Task API reference.
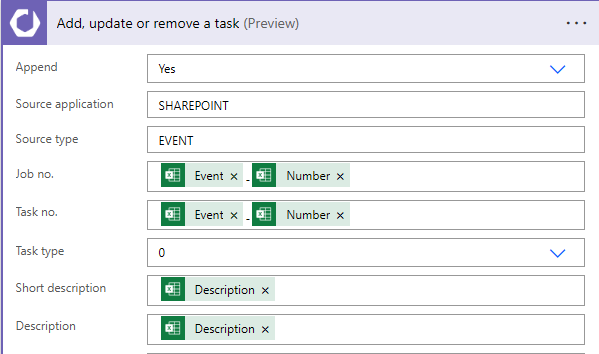
For most actions in the Dime.Scheduler connector for the Power Platform, the first field is a Yes/No field that asks whether to append the record or remove it. To append is to create or update a record, and it's idempotent: if a record already exists with that external identifier, it's updated. When set to false, Dime.Scheduler attempts to remove the record with the external identifier (JobNo or TaskNo) you provide in the action. For this tutorial, set append to true.
What makes the Power Platform so powerful is that you can simply click your workflows together. Inside an action, Power Automate tells you which fields are in scope. Using the mapping table from step 1, look for the right field in Dime.Scheduler and populate it with the columns of the Excel sheet:

For the source app and source type fields, we've set static values that apply to all data passing through this flow. For each job in the Excel sheet, we'll know its original data source is a SharePoint library and that it comes from the 'Event' sheet.
When creating a task, you need to provide a unique external identifier in the TaskNo field, and you also need to reference a job using the job's unique external identifier in the JobNo field. So the value of the Job No field in both actions must be the same (as must the Source App and Source Type fields).
Two additional fields aren't visible in the screenshot below:
- Duration in seconds is set to 14400. This value (4 hours) sets the initial value of the appointment when it's dropped on the planning board.
- Subject is set to 'Event
Number:Description'. When dropped on the planning board, this format sets the appointment's subject.
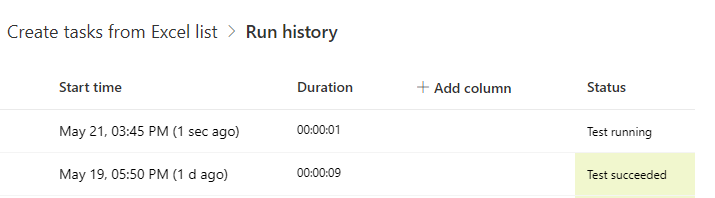
Save the flow, hit the Test button at the top-right corner of the screen, select 'Manually', and click the Test button at the bottom of the fly-in window.
To follow up on the status of this flow, go to the 'Run history' section of the flow and click the last run:
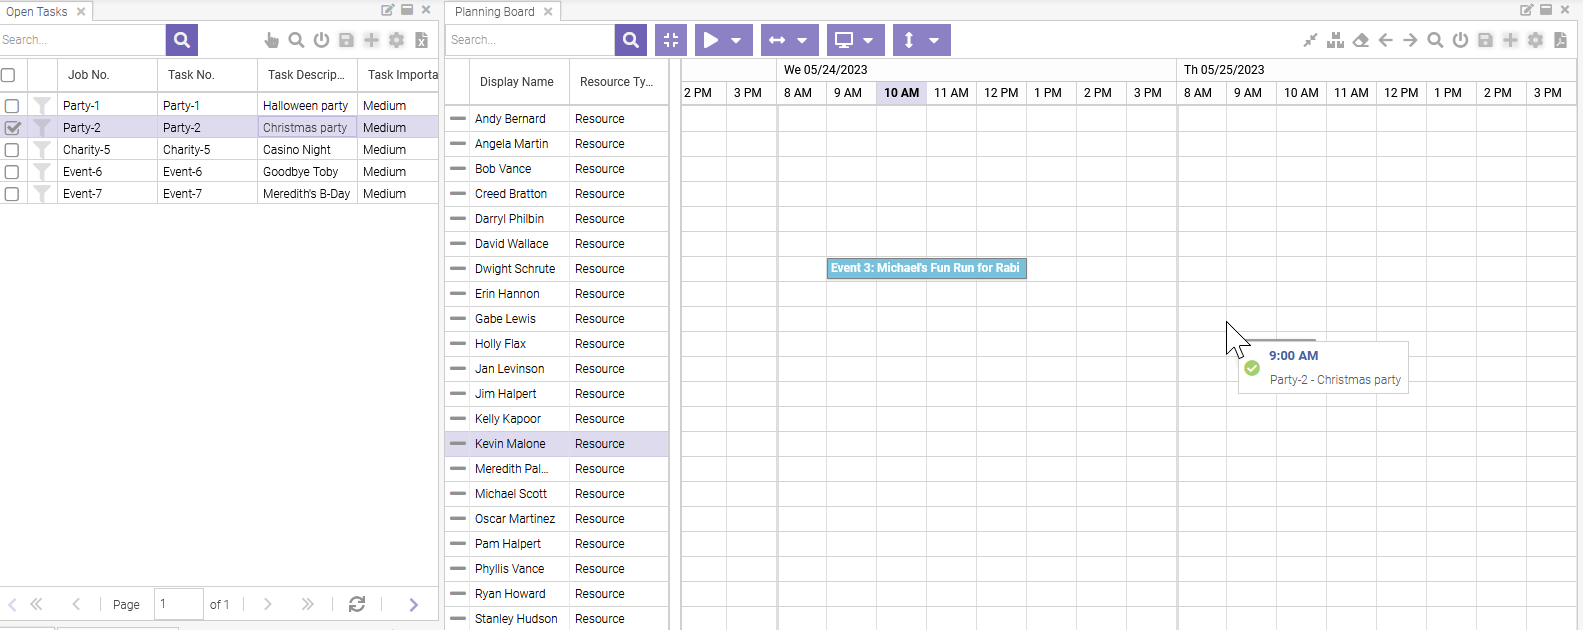
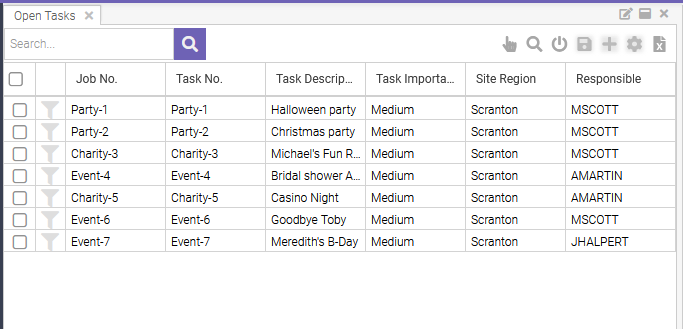
When you navigate to the open task list, you'll see the list of tasks:
If nothing appears, check the status of the step in the Power Platform, or the logs in Dime.Scheduler.
Congratulations, you've added tasks to Dime.Scheduler and are ready to plan them. Take any task, look for an available resource, drag and drop it on the right date and time, and you're done.