Part 2: Resources
In this part you take a list of resources stored in an Excel file and make them available in Dime.Scheduler.
This is the second post in the guide on how to integrate Dime.Scheduler with Microsoft Excel through the Power Platform:
- Part 1: Setting up the connector
- Part 2: Resources
- Part 3: Tasks
- Part 4: Processing appointments
By the end, you will know how to:
- Use the resources action in the Power Platform connector
- Create and manage resources in Dime.Scheduler
- Schedule resources in the planning board
Step 1: A first look at the data
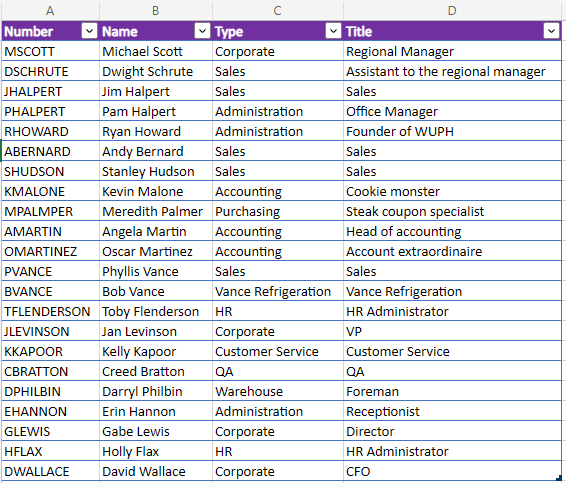
This tutorial shows how a simple Excel file becomes a powerful data source for scheduling. The Excel file is stored in a SharePoint library, which makes it easy for the Power Platform to connect to. The file contains a list of employees we want to schedule, in the 'Resources' sheet:
The work that needs to be done is listed in the 'Events' sheet:
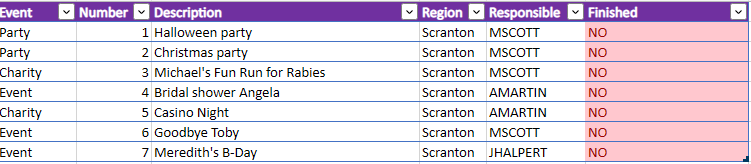
These two sheets demonstrate the two dimensions of Dime.Scheduler's data model. Everything revolves around the actor that carries out the work (the Resource) and the work itself that needs to be carried out (the Task). In this example, the employees are the resources and the office events are the tasks.
This example is deliberately simple. As long as the Power Platform can tap into your data source of choice, whether that is a SharePoint list or service cases in Microsoft Dynamics CRM, you can use it to feed information into Dime.Scheduler. Think of the Power Platform as a toolbox that connects your application suite to Dime.Scheduler.
This part focuses on resources and how to make them available in Dime.Scheduler. The next part does the same for the work that needs to be planned.
Step 2: What constitutes a resource
A resource is someone or something that can be scheduled. That is as specific as the definition gets, which makes it an open-ended and flexible concept. You might plan consultants, meeting rooms, and vehicles all at once in the same tool. You decide what constitutes a resource.
In this tutorial, the resources are employees of the company Dunder Mifflin Inc. You could account for many dimensions when planning employees, such as seniority, expertise, languages, and region. But since the goal here is to showcase the connectivity between the Power Platform and Dime.Scheduler, we keep it simple and track only their name, department, and job title, as shown in the Excel sheet above.
Dime.Scheduler's Resource entity contains many fields and references to other entities, as you can see in the API reference. Because we have only a handful of fields in the Excel sheet, we need just a small subset of the available Dime.Scheduler fields:
| Employee field (Excel) | Resource field (Dime.Scheduler) | Comment |
|---|---|---|
| Number | ResourceNo | The ResourceNo field serves as an external text identifier that can be traced back to a single entity. |
| Name | DisplayName | |
| Type | Department | |
| Title | FreeText1 | There is no field for a job title, but we can use one of the FreeText fields. |
| N/A | SourceApp | We will use a fixed value to indicate that the original data source is the Excel file in the SharePoint library. This is particularly useful in situations where you manage resources from multiple back-office systems. |
| N/A | SourceType | We will use a fixed value to indicate that the original data source is the 'Resources' sheet in said Excel file. |
| N/A | ResourceType | Since we only will plan employees, we can use a static value. |
Many entities in Dime.Scheduler have a field named after the entity, followed by 'No'. For example, ResourceNo, TaskNo and JobNo all create a link between the records stored in the database of the original system and those in Dime.Scheduler. This link is crucial when you want to write schedule information back after planning a resource or task.
The SourceApp and SourceType fields matter too when you schedule resources and work items from various data sources. SourceApp identifies the underlying back-office system (in this case the Excel file), while SourceType represents the underlying data set (in this case the 'Resources' Excel sheet).
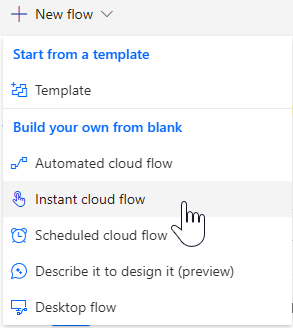
Step 3: Create a new flow
Create a new flow in Power Automate. To keep things simple, create one you trigger manually:
In the modal window, give the flow a name and select 'Manually trigger a flow':
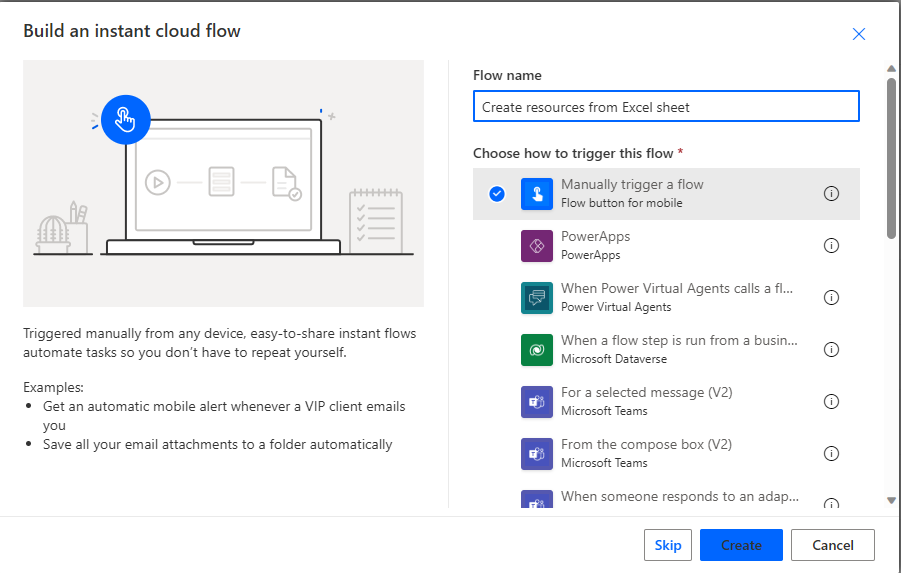
The Flow builder opens with the trigger already on the canvas. Now the real work begins.
Step 4: Looping through each record in the Excel sheet
One advantage of storing the Excel file on Office 365 is that the Power Platform can not only access the file, but also read and update its rows and columns. In this example, we want to send over the entire list in the 'Resources' sheet, and one command runs an action against every item it finds.
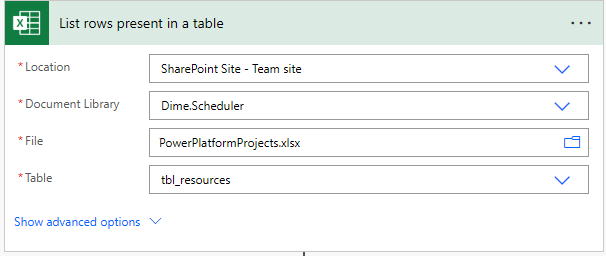
Add a step to the flow and look for the action 'List rows present in a table' in the Excel Online connector. The action is straightforward: tell it where to find the Excel file and which table to read:
With the list in hand, iterate through each record in the table using the 'Apply to each' action. For each record, we want to add a resource in Dime.Scheduler. Inside the 'Apply to each' section, add the action 'Add, update or remove a resource' from the Dime.Scheduler connector:
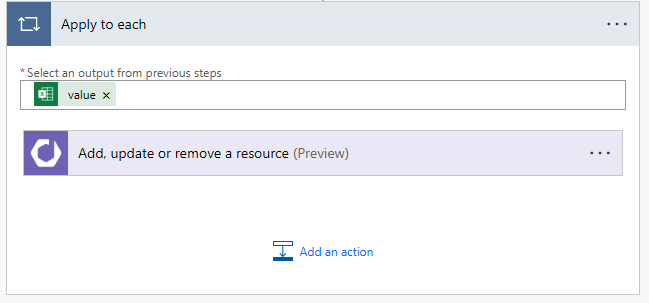
In the output field of the loop action, select value.
Step 5: Inserting resources
When you expand the resource action, you'll find an extensive list of fields that control the behavior of Dime.Scheduler. For more detail, see the API reference.
For most actions in the Dime.Scheduler connector for the Power Platform, the first field is a Yes/No field that asks whether to append the record or remove it. To append is to create or update a record, and it is idempotent: if a record already exists with that external identifier, it is updated. When set to false, Dime.Scheduler attempts to remove the resource with the resource number you provide in the ResourceNo field. For this tutorial, set append to true.
What makes the Power Platform so effective is that you can click your workflows together. Inside an action, Power Automate shows you which fields are in scope. Using the mapping table above, find the right field in Dime.Scheduler and populate it with the columns from the Excel sheet:
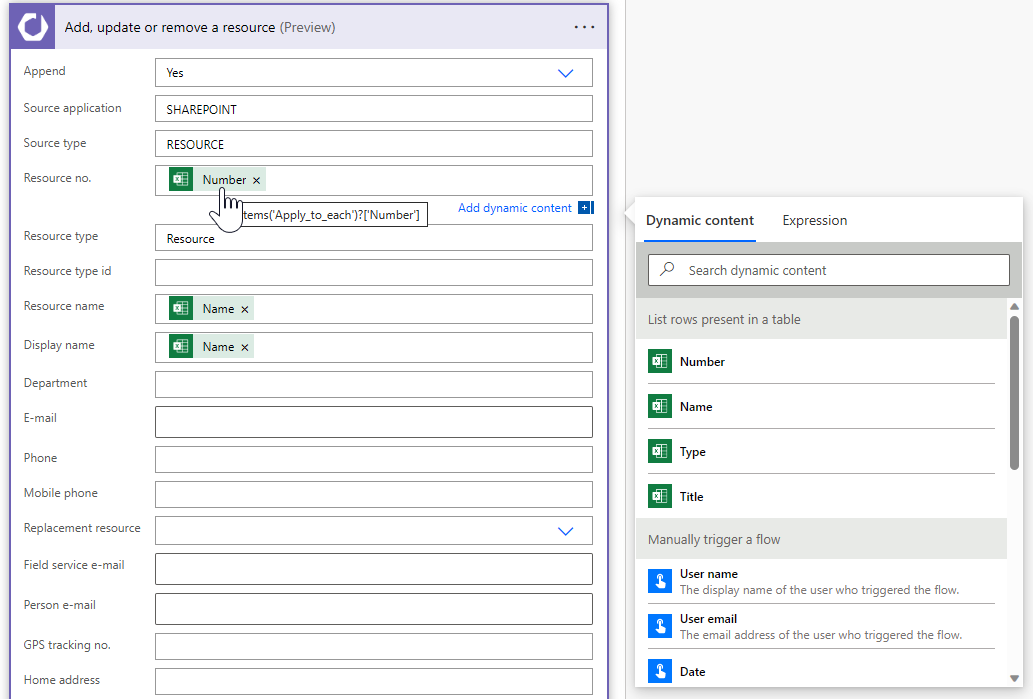
For the source app, source type, and resource type fields, we added a static value that applies to all data passing through this flow. For each resource in the Excel sheet, we then know that its original data source is a SharePoint library and that it comes from the 'Resource' sheet. The resource type field distinguishes between different types of resources. You only need to specify a name, and Dime.Scheduler creates the type while appending the resource. We've kept it simple and used the default value that ships when you deploy Dime.Scheduler.
Save the flow, hit the Test button in the top-right corner, select 'Manually', and click the Test button at the bottom of the fly-in window.
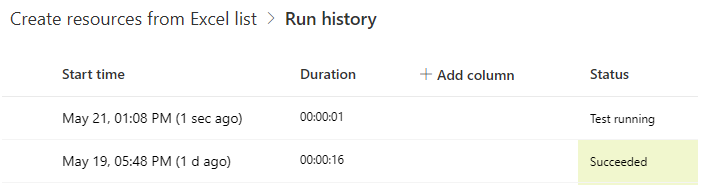
To follow the status of the flow, go to its 'Run history' section and click the last run:
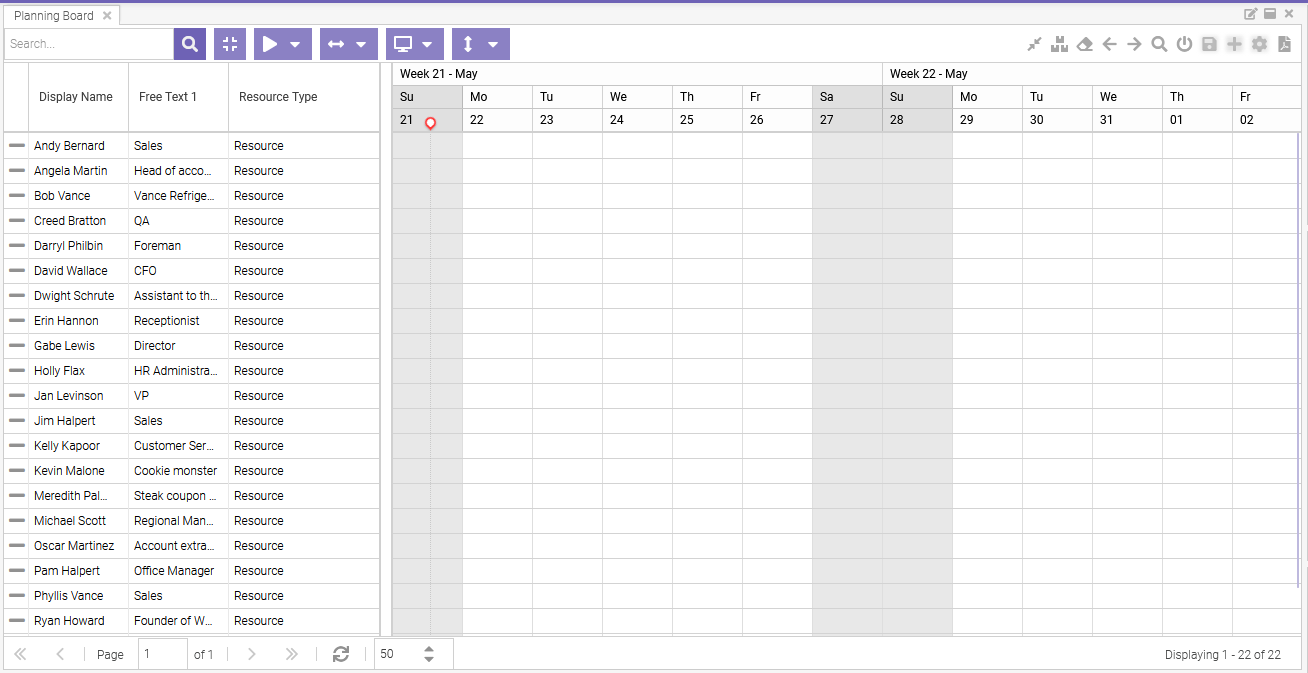
When all goes well, you will see the list of resources in the planning board:
If nothing appears, check the status of the step in the Power Platform, or the logs in Dime.Scheduler.
To change the caption of the 'Free Text 1' field, go to Settings -> Localization, find the FreeText1 field on the 'Resource' source table, select it, and add a caption in your language. The application will then display something more meaningful, such as 'Job title' instead of the field name 'FreeText1'.
Congratulations, you've added resources to Dime.Scheduler and are ready to schedule them. You can already create manual appointments on the planning board. It takes two to tango, though, so the next part focuses on the list of work that needs to be planned.