Tutorial: Booking
This tutorial shows you how to make a Microsoft Booking appointment appear in Dime.Scheduler. You'll go one step further than the usual planning process: instead of routing the work through the open task list, you'll push the appointment straight onto the planning board.
Step 1: What constitutes a task
Dime.Scheduler is all about planning resources and tasks. Both concepts can refer to anyone or anything: a resource is an entity that can carry out work, while a task is the unit of work that a resource needs to execute.
Booking appointments shift the picture slightly, because the planning has already happened. To keep a complete view of your workforce's schedule, you can link the appointments generated in Booking back to Dime.Scheduler, and that is exactly what you'll do here.
Like the other tutorials in this section, this example is deliberately simple. The task data model in Dime.Scheduler handles far more complex business scenarios because it has two levels: jobs and tasks. A job is the high-level entity, best compared to a project: a collection of activities (the tasks) that need to be completed to reach an outcome. Jobs bundle common information that applies to all their tasks, such as customer info, billing details, and address. For the full list of a job's properties, see the API reference. A task is the actual unit of work to be carried out. Every task belongs to a job and uniquely identifies an item of work that lands in the open task list and, once scheduled, on the planning board. For the full list of a task's properties, see the API reference.
This data model gives you many ways to organize work. In this tutorial you'll use a demonstration booking page, so it makes sense to group every instance of this booking type (a service, in Booking terms) under the same job. Demonstrations are typically free of charge, so there's no need for a more granular design.
This use case introduces a third entity: the appointment. An appointment assigns a resource to a task on a given date and time. Put simply: Appointment = Task + Resource + Date & Time. By calling this API in the Power Platform connector, you can push appointments directly onto the planning board.
Step 2: Create a new flow
Start with your booking page. This isn't a tutorial on building a Booking page, but there is one crucial piece of information you'll need to continue.
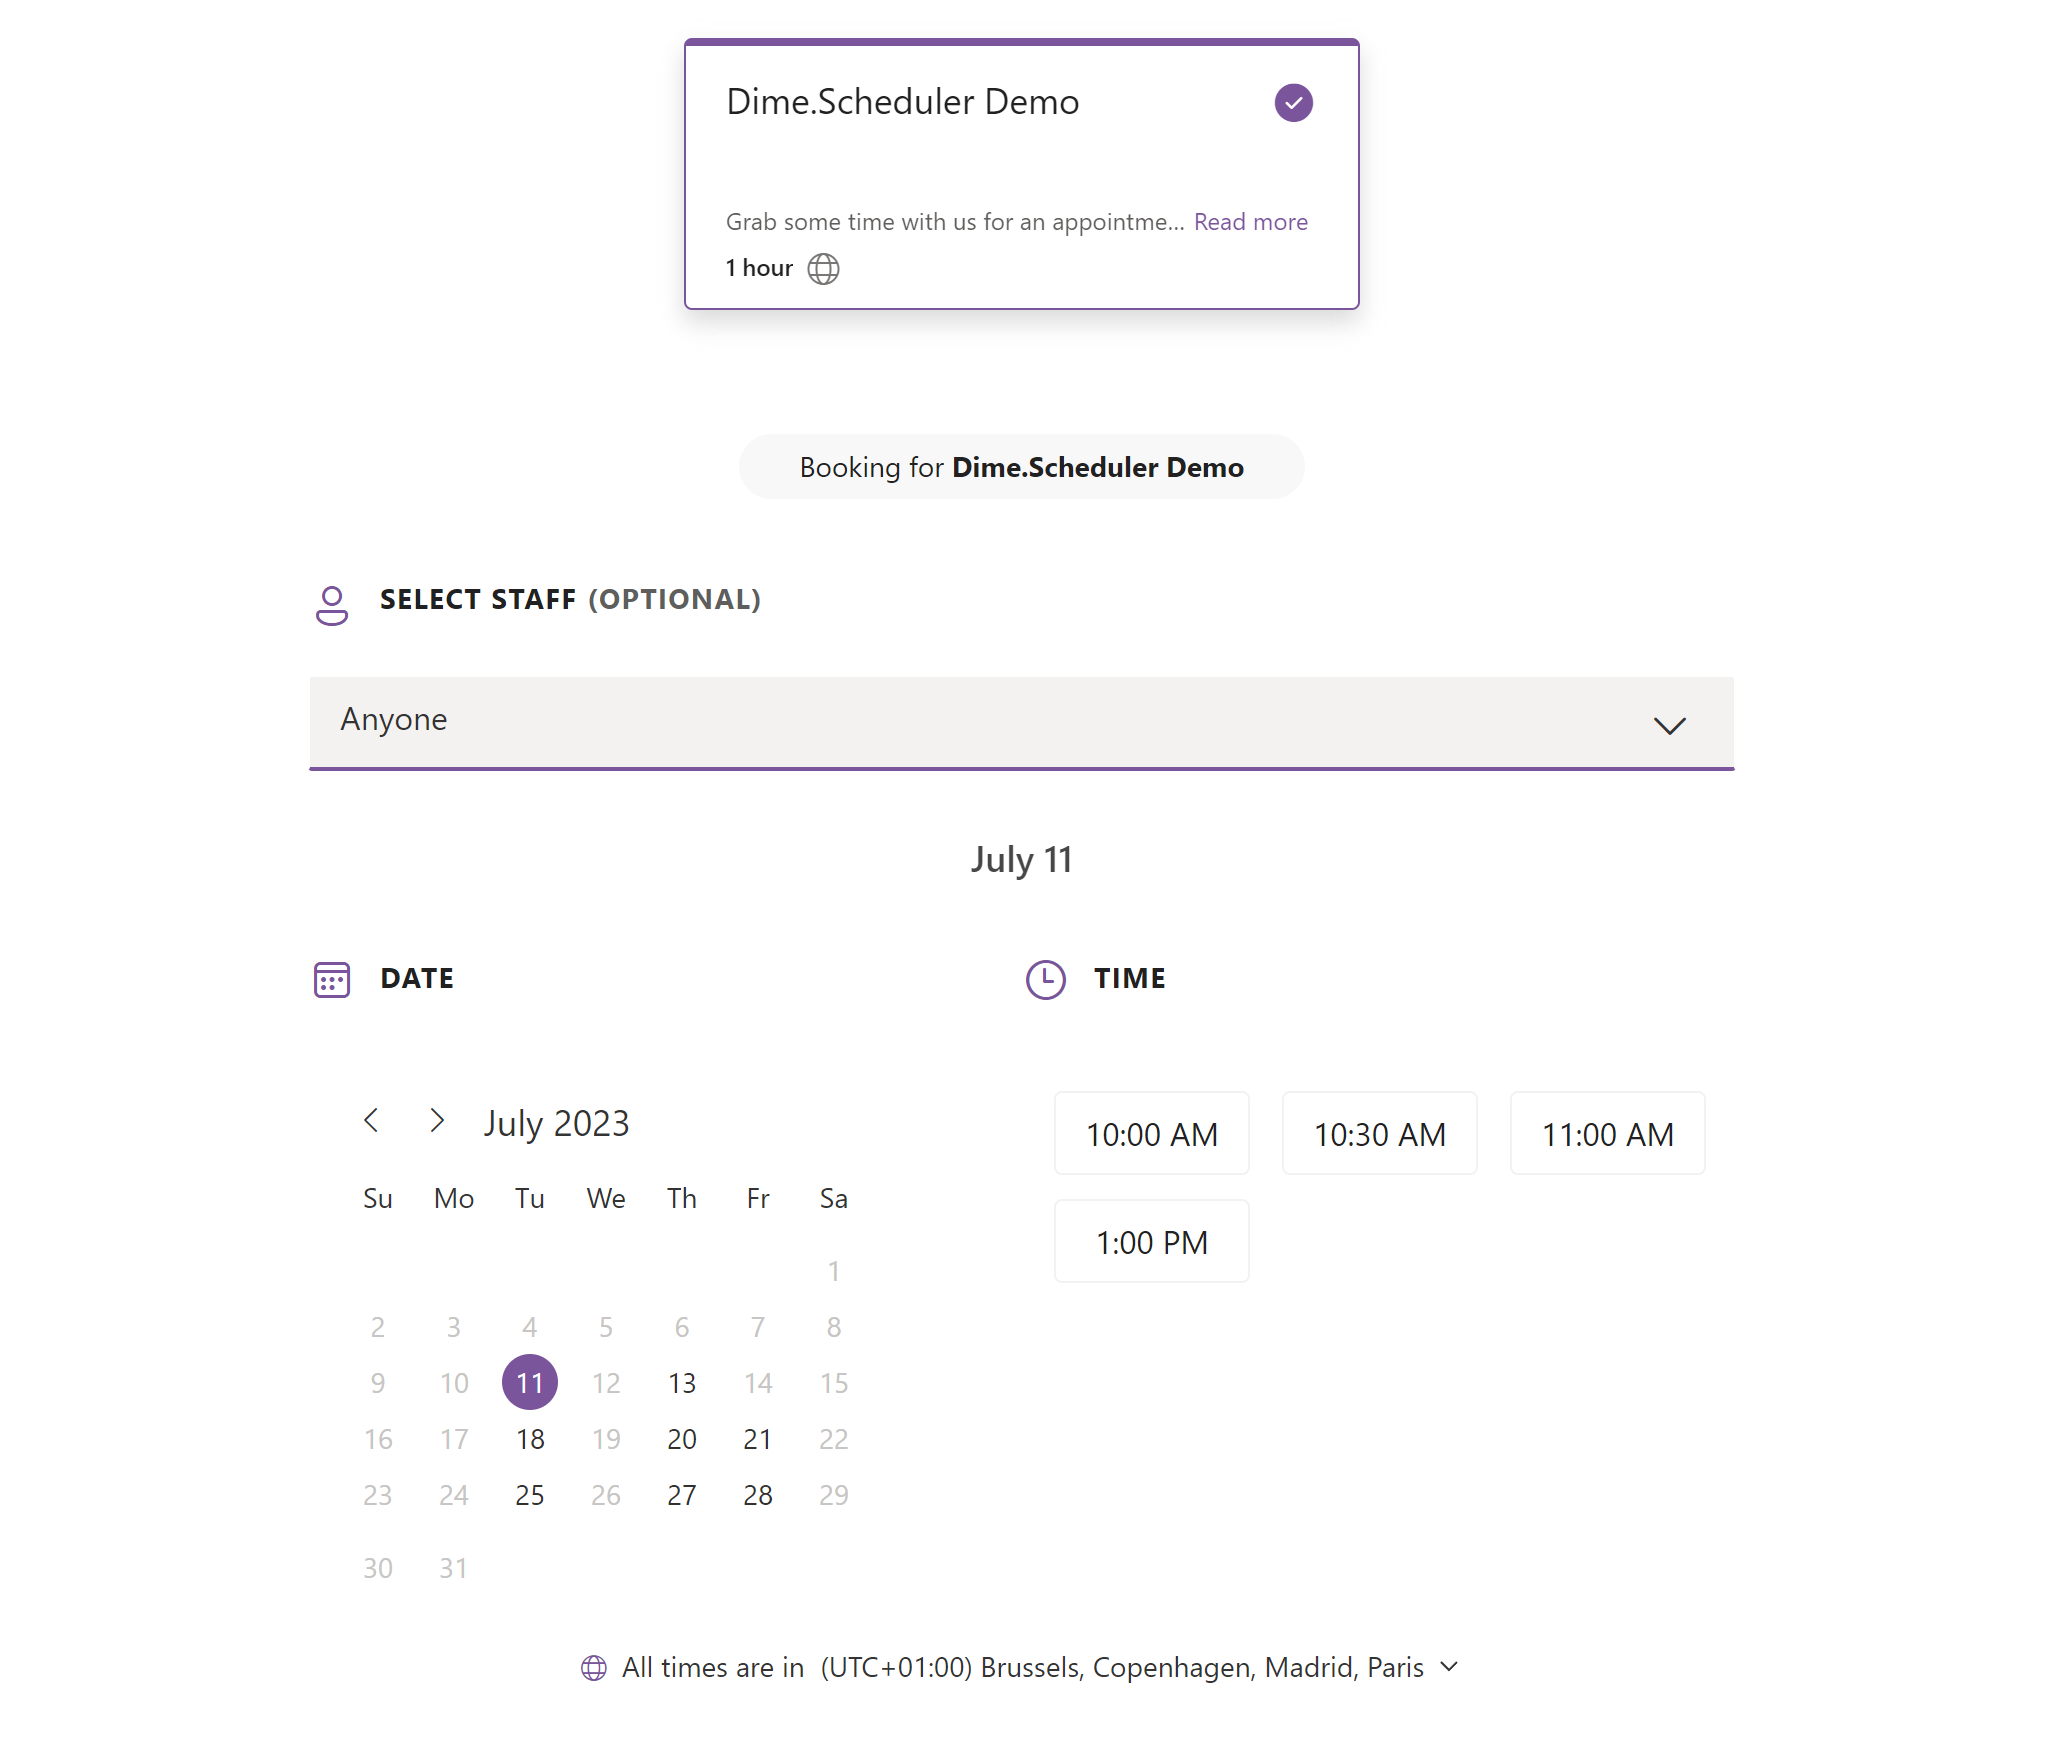
Once the page exists, several places let you copy its link. It typically looks like this:
https://outlook.office365.com/owa/calendar/[email protected]/bookings/s/s_umXVExTECHTgc3QyIybw2
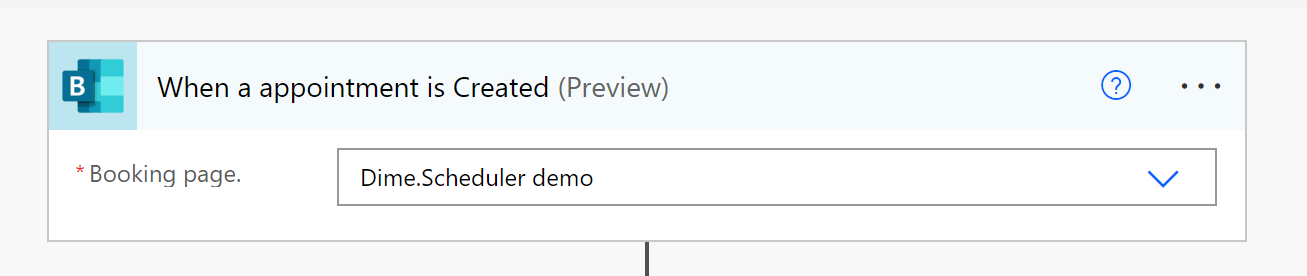
Copy the email address from this URI. You'll use it in the trigger of a new flow in Power Automate. Choose the 'When a appointment is Created' trigger and paste the email address into the booking page address field:
Step 3: Inserting appointments
As noted above, a plannable task in Dime.Scheduler has two levels: jobs and tasks. A job holds the high-level properties such as customer and billing info, while a task concerns only the work to be performed. To make a Booking appointment available in Dime.Scheduler, you'll invoke two actions in the flow: create a job, then create a single task for that job. Expanding either action reveals an extensive list of fields you can use to shape Dime.Scheduler's behavior. For the details, see the Job API reference and Task API reference.
For most actions in the Dime.Scheduler connector for the Power Platform, the first field is a Yes/No field that asks whether to append or remove the record. Append means create or update, and it's idempotent: if a record already exists with that external identifier, it gets updated. When set to false, Dime.Scheduler attempts to remove the record matching the external identifier (JobNo or TaskNo) you provide. For this tutorial, set append to true.
The Power Platform lets you click your workflows together. Inside an action, Power Automate shows you which fields are in scope. Find the right field in Dime.Scheduler and populate it with the info a Booking appointment provides:

For the source app and source type fields, we've set static values that apply to all data passing through this flow. That way, every Booking appointment that flows through is marked with a Booking item as its origin and a generic 'Demo' type. If your booking page has multiple services, you can use these fields to distinguish between the different service types in Dime.Scheduler as well.
When creating a task, provide a unique external identifier in the TaskNo field and a reference to its job using the job's unique external identifier in the JobNo field. The Job No field must therefore hold the same value in both actions (and so must the Source App and Source Type fields).
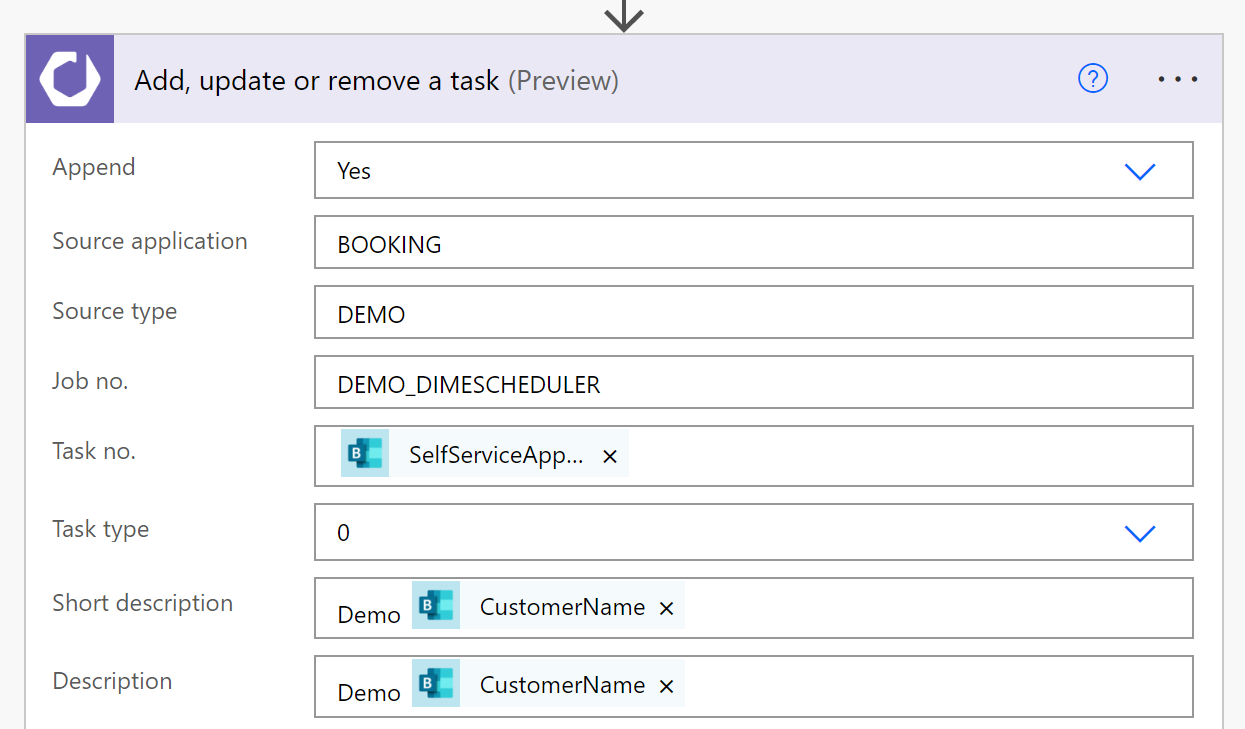
A Booking appointment carries a lot of information. This tutorial uses a 1:N relationship between a job and its tasks, so customer information belongs on the task level. (On the job level it would be overwritten every time a new prospect books a meeting, and you'd lose data.) If you'd rather track each appointment individually, use a 1:1 approach instead, which lets you place customer information on the job level.
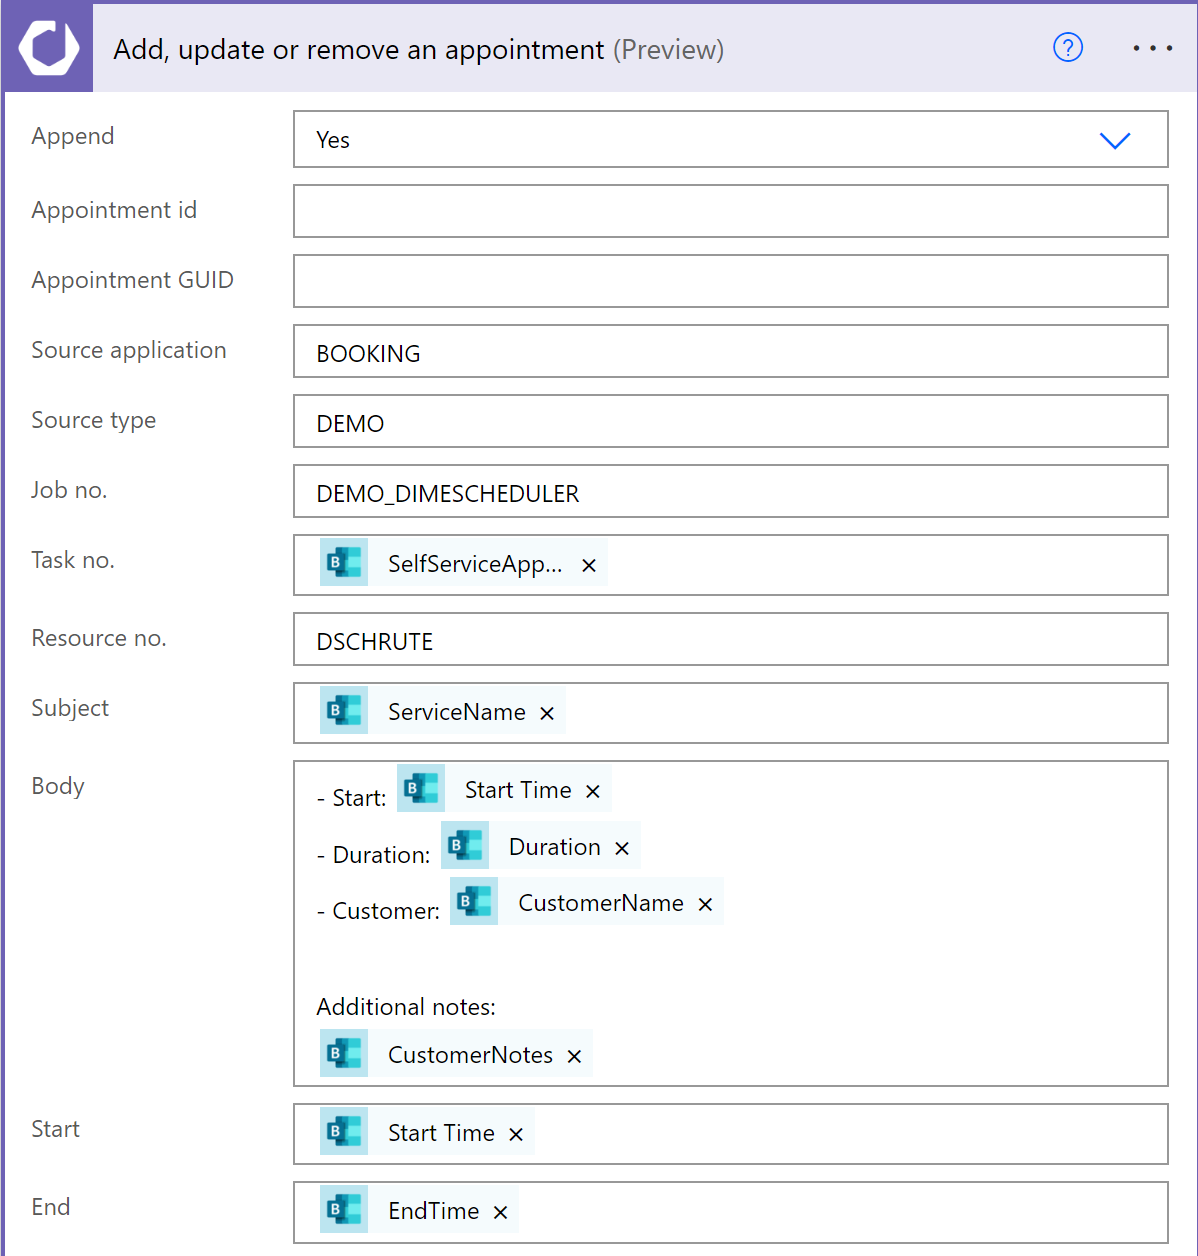
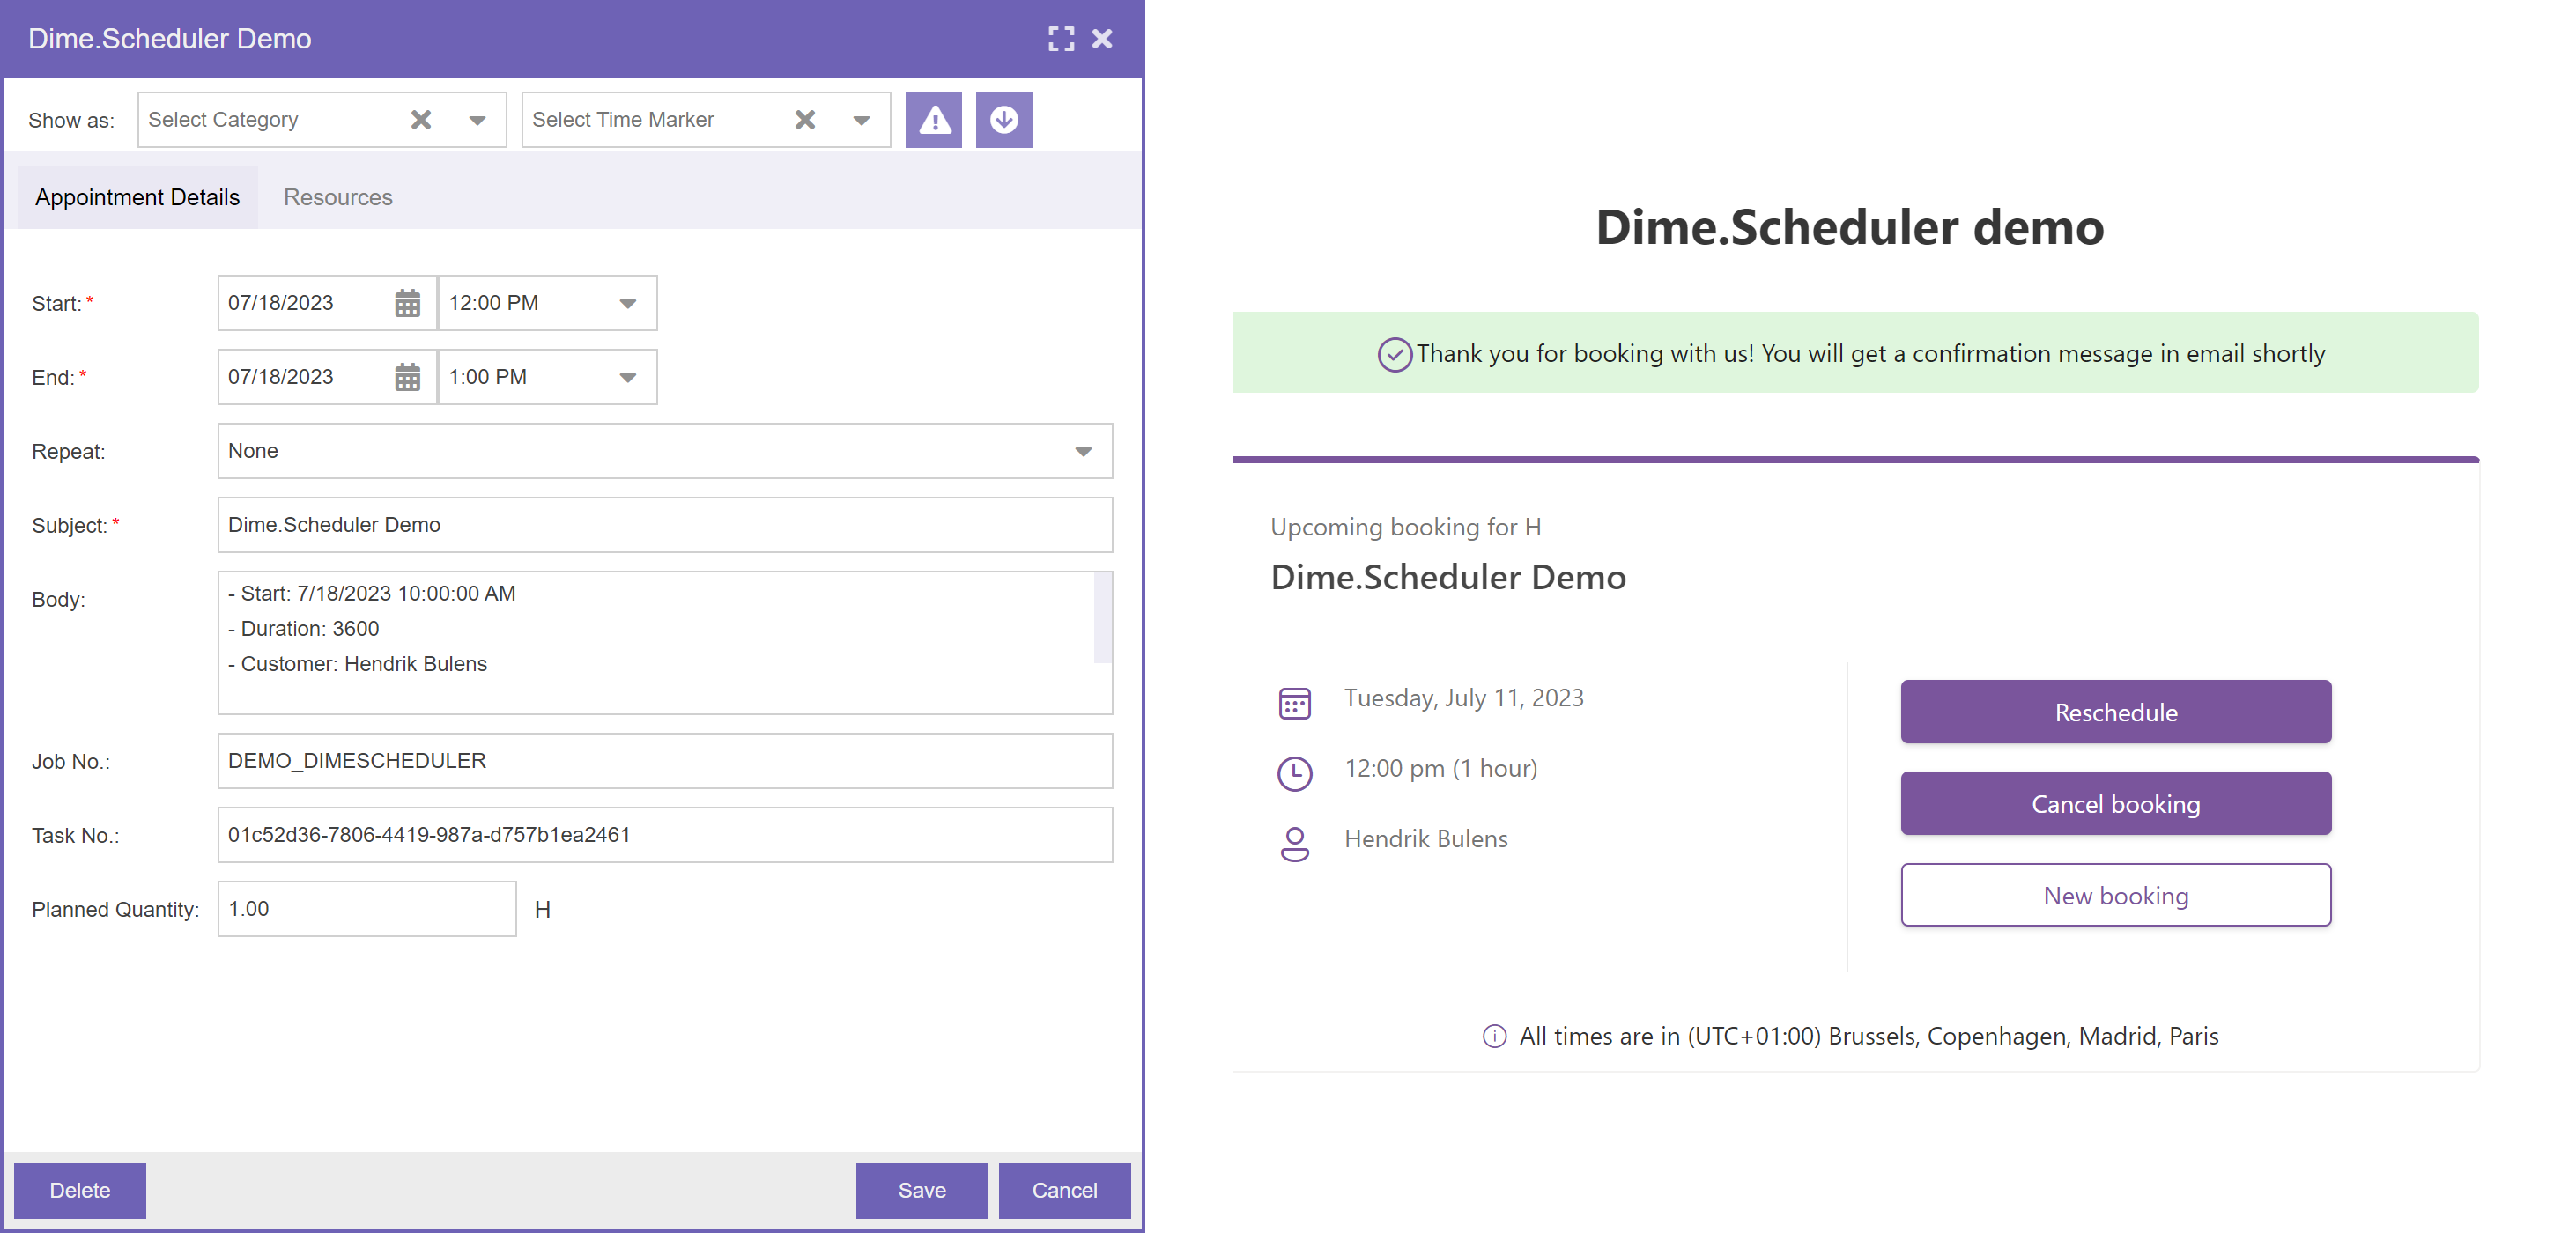
The final step creates the appointment. This action resembles the others: specify the source app, source type, job no, and task no so the application knows which task the appointment belongs to. These fields should reference the same values you used in the previous steps. On top of that, specify a start and end time and the resource number assigned to the Booking appointment:
Save the flow and test it by creating a new Booking appointment.
To check the status of the flow, go to its 'Run history' section and open the most recent run:

Open the planning board, and you should see a new appointment that holds the exact same information as the Booking appointment. If nothing appears, check the status of the step in the Power Platform, or the logs in Dime.Scheduler.
Congratulations, you've just added a new appointment to Dime.Scheduler!