Establishing a connection with NAV
This completes the loop. The FastTrack Wizard connected NAV to Dime.Scheduler; this connector entry is the reverse path. Every planning action in Dime.Scheduler is sent straight to the NAV web service, where NAV's business logic processes it. You give the connector two things: the web service URL and how to authenticate.
This page only covers the NAV-specific bits. For everything else about connectors, see the connector setup docs.
Web service URL
Two Dime.Scheduler objects need to be published in the NAV web service setup. The FastTrack Wizard adds them automatically; to do it by hand, add them yourself:
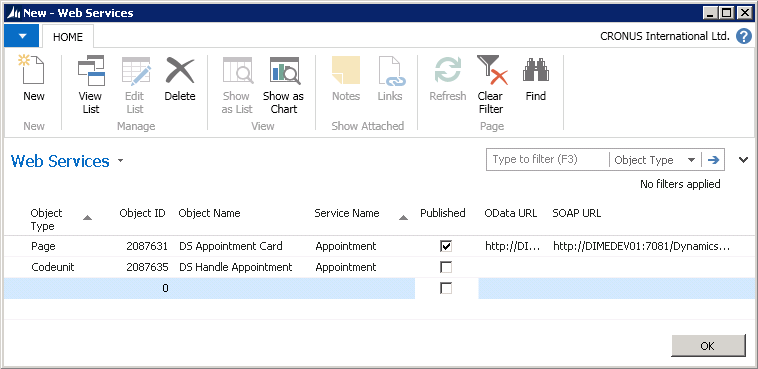
Keep the service Name as Appointment, and publish the page only.
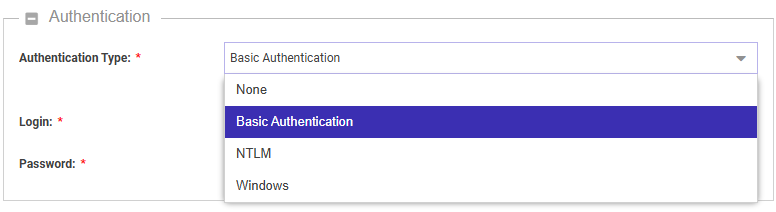
Authentication
NAV supports three methods:
- Web service access keys
- Basic authentication
- Windows auth: NTLM and Kerberos
Web service access keys
Microsoft's web service authentication guide walks through obtaining an access key.
Basic / Windows auth
Both configure the same way: in the connector's Authentication section, pick the type and enter the credentials of a NAV service account Dime.Scheduler can use.
Source App
The source app must match the value you set in the FastTrack Wizard back in NAV. It's what tells Dime.Scheduler which back-office system a given resource, task or appointment belongs to.