Microsoft Entra ID App Registration
For Dime.Scheduler to reach your Microsoft 365 calendar data, the administrator grants it access through an application registration in Microsoft Entra ID. A registration defines exactly what an application may do, so grant the least-permissive set that works and nothing more.
You can create the registration two ways: by hand in the Azure portal, or with a PowerShell script. Either way, you'll end up with three values to paste into the Exchange setup page:
- the Entra ID tenant id
- the app registration client id
- the app registration client secret
Create an Entra ID app registration with the required API application permissions, then copy the tenant id, client id, and client secret into Dime.Scheduler's Exchange configuration page.
Required API application permissions:
- Calendars.Read/Write
- MailBoxSettings.Read/Write
- User.Read.All
A common mistake is creating delegated permissions instead of application permissions. Create application permissions, and grant admin consent.
Option 1: create the app manually
Register a new application
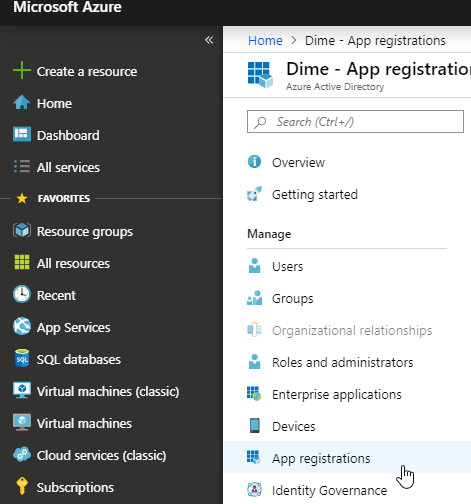
Sign in to the Azure portal, making sure you're on the right account and subscription. Go to the Microsoft Entra ID service, open the Manage submenu, and click App registrations.
Click New registration and fill in:
- Name: e.g. Dime.Scheduler
- Supported account types: Accounts in this organizational directory only
- Redirect URI: select Web, then enter
https://app.dimescheduler.com/signin-microsoft
Add permissions
- On the app's Overview page, select API permissions.
- Click Add a permission and add:
- Calendars.Read/Write
- MailBoxSettings.Read/Write
- User.Read.All
- Grant admin consent.
Get the client id and secret
The client id is on the app's Overview page:

Create the client secret under Certificates & secrets:

Secrets expire, so either pick a far-off expiry date or update the value in Dime.Scheduler before it lapses.
Option 2: create the app with a script
Open PowerShell as administrator and install the script from the PowerShell Gallery:
Install-Script -Name DimeScheduler.InstallExchangeApp
Move into the script's folder:
cd (Get-InstalledScript -Name "DimeScheduler.InstallExchangeApp").InstalledLocation
You'll need your Azure tenant ID and tenant name (Microsoft's guide to finding them). Then run:
.\DimeScheduler.InstallExchangeApp.ps1 -tenantId MyAzureTenantId -tenantName 'MyAzureTenantName'
The script creates the app registration and a client secret, adds the required permissions (Calendars.Read/Write, MailBoxSettings.Read/Write, User.Read.All), and grants admin consent. It prints the client id and client secret at the end - copy the secret right away, or you'll have to generate a new one.