HR
A schedule that only shows the work is a schedule that lies. If a resource is on leave, in training, or out sick, those hours are gone whether or not the planning board knows it, and a planner who books against them is setting up a conflict. This module keeps that knowledge in sync: employee absences flow both ways between Microsoft Dynamics 365 Business Central HR and Dime.Scheduler, so the people who plan the work and the people who own the HR records are always looking at the same availability. This page walks you through the setup and the three ways planners can register an absence.
Setup
You configure the module in the Fast track wizard.
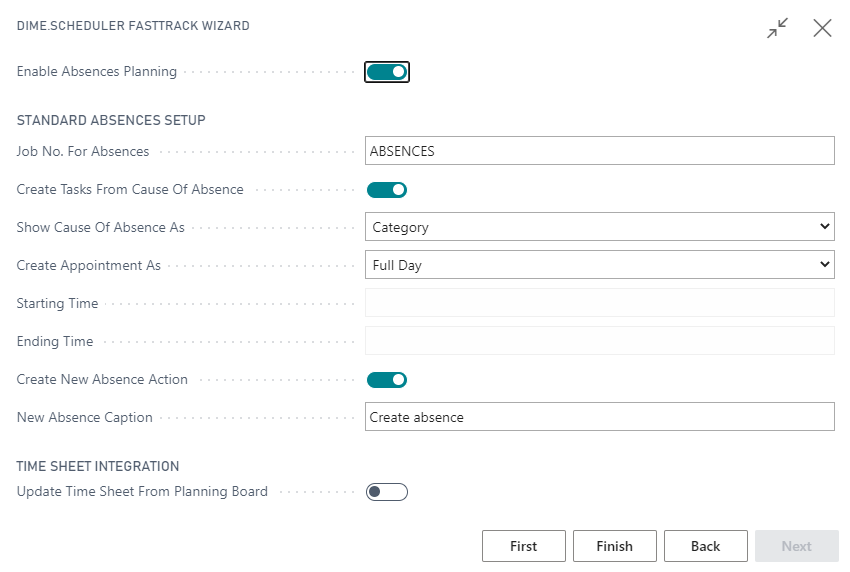
Turn the module on by selecting Enable Absences planning. Everything below only applies once it is enabled.
From there, a handful of settings decide how an absence looks and behaves once it lands on the planning board:
-
Job No. for Absencesanchors the absences. An absence has no header the way a sales or assembly order does, so the wizard creates a default job to hold them. Enter a descriptive code here; planners then use it to sort, group, and filter tasks in the open and planned Tasks grid in Dime.Scheduler. -
Create Tasks from Cause of Absencegenerates the schedulable tasks in Dime.Scheduler from the values in the cause of absence table, so the reasons defined in BC become the things a planner can drag. -
Show Cause of Absence ascontrols whether the reason for an absence is visible at a glance on a planned task, rather than something the planner has to open the task to discover:- Blank: no visual indicator used
- Category: the color of the planned task shows the cause of absence
- Time marker: the time marker of the planned task shows the cause of absence
The video below demonstrates this functionality. It uses service orders, but the behavior is the same for this module:
-
Create Appointment asdecides the shape of the planned task when a user sends an absence from BC or creates one through the action shortcut. Choose Working Time to give the absence a start and end time as specified inStarting TimeandEnding Time, or Full Day to create it as a 24h planned task, in which case theStarting TimeandEnding Timefields are not used. -
Create New Absence Actionexposes the action shortcut so planners can create a new absence from inside Dime.Scheduler. Enter the caption shown to the user there (see the screenshot below).

Causes of absence
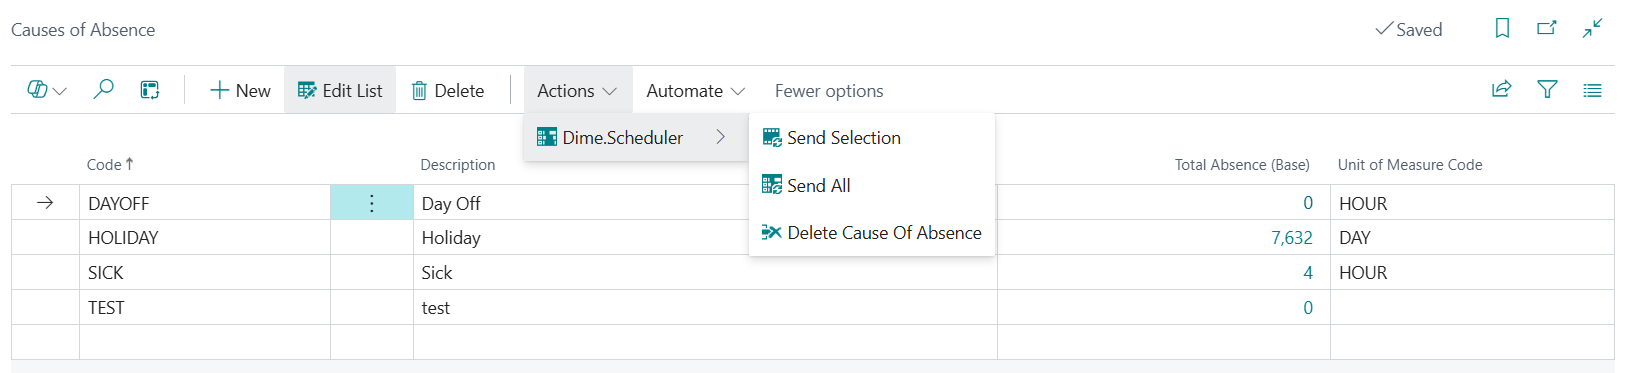
The causes of absence are the raw material a planner schedules against, so they have to reach Dime.Scheduler first. To make that possible, the default actions on the causes of absence page have been extended with two items:
- Send absence (selected range or all)
- Delete selected item
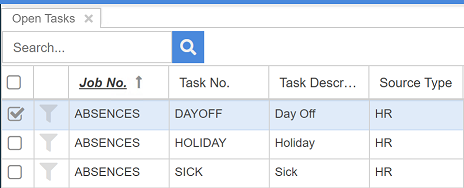
When you send the causes of absence, Dime.Scheduler creates a special job that holds the selected (current and subsequent) causes of absence, and turns each cause of absence into an individual, infinite task.
Because these tasks are infinite, they never disappear from the open tasks list. That is deliberate: an "out sick" or "vacation" task is a reusable building block, always there and ready to be dragged whenever a planner needs it.
Absence registration
Dime.Scheduler builds on standard Business Central functionality and adds visual scheduling on top of it, and it offers three routes to register an absence so each role can work where it makes sense:
- Drag and drop, using the absence tasks inside Dime.Scheduler
- The action shortcut (right-click on the planning board for the selected resource and date) to create an absence in BC
- Entering an absence in BC and sending it as a planned task to Dime.Scheduler
Creating absences
Drag and drop
Drag and drop is the fastest option for planners who prefer to stay in Dime.Scheduler. Because the task always sits in the open tasks list, registering an absence takes just a few clicks: pick the cause of absence, drag the task onto the right timeslot for the right resource, and the absence is registered.
Business Central
Because the sync runs both ways, the HR side is just as valid a starting point. On the absence registration page in Business Central, create an absence and send it to (or remove it from) Dime.Scheduler. The planner never has to re-enter it; it simply appears on the board.
