Establishing a connection with BC
The FastTrack wizardFastTrack wizardThe setup wizard inside Business Central or NAV that connects it to Dime.Scheduler and switches on the modules to plan from. It writes the source app and creates the source types for each enabled module. taught Business Central how to talk to Dime.Scheduler. This page is the other half of that conversation: it teaches Dime.Scheduler how to talk back. Concretely, you create a connectorConnectorAn integration that links Dime.Scheduler to a back-office system, routing data in and scheduling decisions back out. in Dime.Scheduler that knows two things - where to find this BC instance (a web service URL) and how to authenticate against it (a credential). With those, every appointmentAppointmentA task scheduled to a resource for a specific period - the scheduled instance you see on the planning board. you draft on the planning boardPlanning boardThe main graphical scheduling surface where dispatchers drag tasks onto resources across a timeline. can be written into BC the moment you save it.
This page only covers the BC-specific bits. For the rest of what connectors can do, see the connector setup docs.
Where to reach BC
The Dime.Scheduler extension publishes its appointment endpoint in two flavors - a classic SOAP web service and a modern REST API page - and which one you use is mostly historical preference. Pick one in the connector's API Type field, then paste the matching URL below.
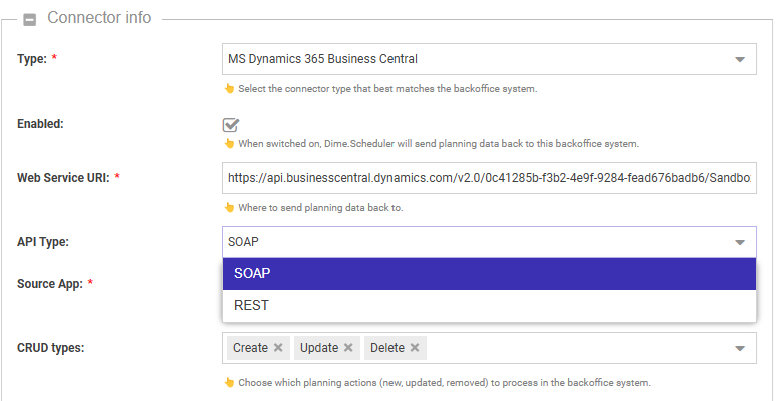
SOAP
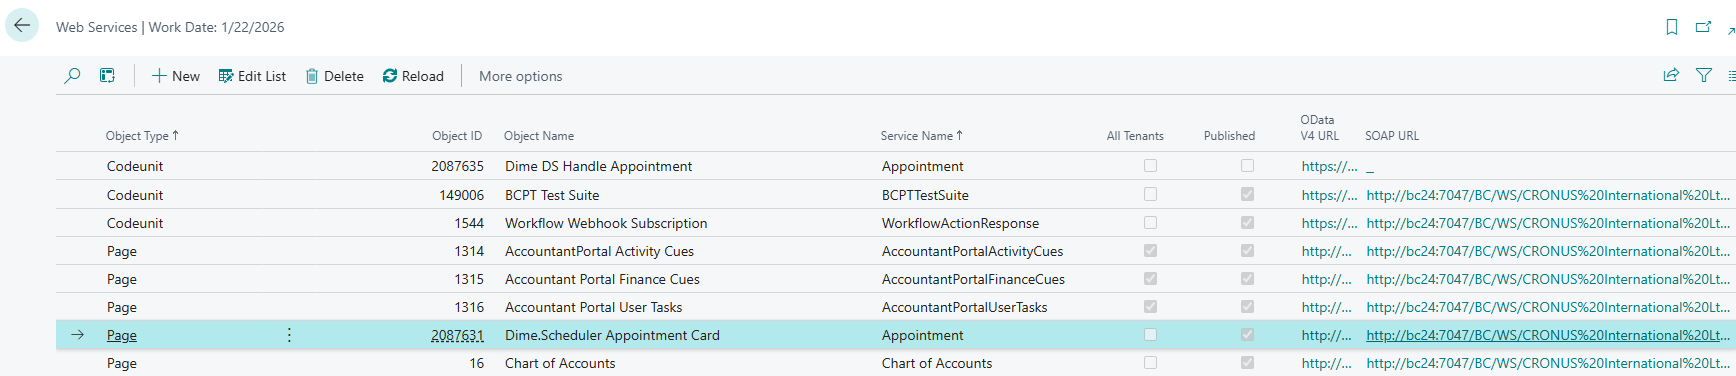
In BC, open the Web Services page, find the Dime.Scheduler Appointment Card page, and copy its SOAP URL. The shape is:
https://{YOUR_URL_TO_BC}:7047/WS/Page/Appointment
API page (REST)
The REST URL follows this format:
https://{YOUR_URL_TO_BC}/api/dimeSoftware/dimeScheduler/v1.0/companies({COMPANY_ID})/appointments
Two placeholders: the URL to BC itself, and the company ID (the company GUID, which BC will show you on the company card):
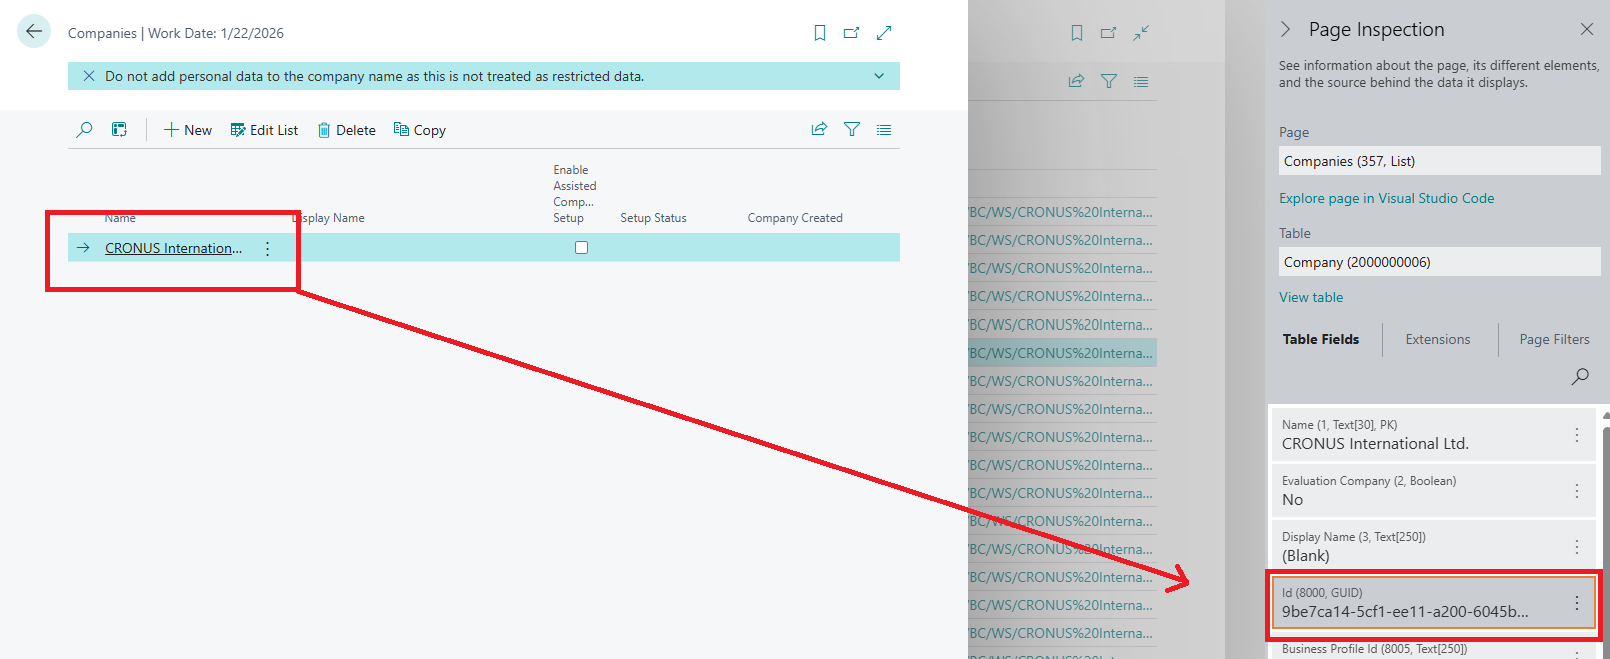
Paste the finished URL into a browser to make sure BC responds before you save the connector. For BC Cloud, the shape is slightly different:
https://api.businesscentral.dynamics.com/v2.0/{USER_DOMAIN_NAME}/{ENVIRONMENT_NAME}/api/dimeSoftware/dimeScheduler/v1.0/companies({COMPANY_ID})/appointments
Here, {USER_DOMAIN_NAME} is the Entra ID tenant GUID, {ENVIRONMENT_NAME} is the BC environment's display name, and {COMPANY_ID} is the company GUID from above.
How to authenticate
Which method?
On-premises BC accepts three options; cloud BC only accepts one. The pragmatic story is short: Microsoft has deprecated everything except OAuth2, and even on-prem the REST API page won't talk to Windows authentication at all. Unless you have a hard reason otherwise, use OAuth2.
| Method | SOAP Web Services | API page |
|---|---|---|
| Basic authentication | ✅ | ✅ |
| Windows auth: NTLM and Kerberos | ✅ | ❌ |
| OAuth2 | ✅ | ✅ |
For BC online (Cloud), OAuth2 is the only option.
Basic / Windows (on-premises)
These two configure the same way: in the connector's Authentication section, pick the type and enter the credentials of a BC service account Dime.Scheduler can use.

OAuth2 with Microsoft Entra ID
OAuth2 is more involved because it doesn't rely on a single password; it relies on an app registration in Microsoft Entra ID that Dime.Scheduler can use to request tokens on its own behalf. The setup has three places you need to touch, in this order:
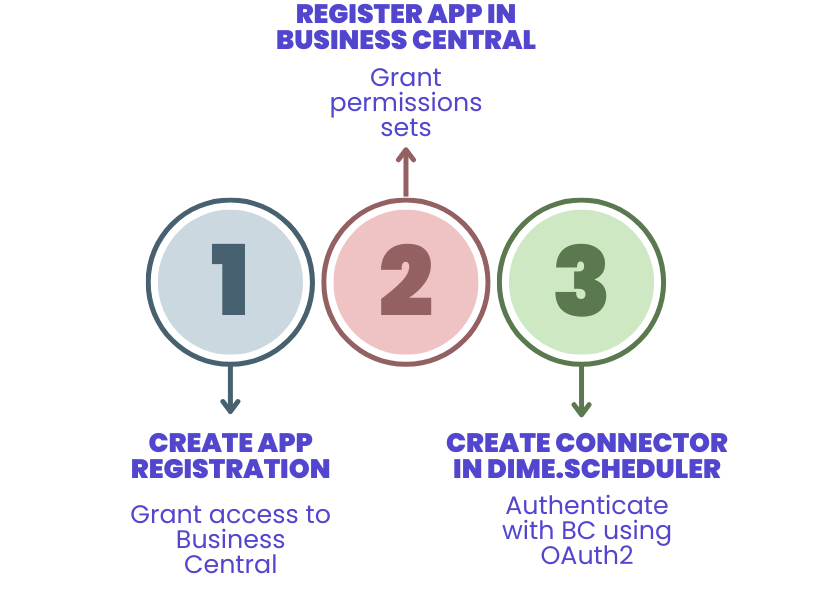
- Register an app in Entra ID. This is the identity Dime.Scheduler will use.
- Tell Business Central that this app is allowed in, and which permission sets it has.
- Tell Dime.Scheduler where that app lives and how to prove it owns it.
Microsoft's register-an-app guide covers the Entra ID side in depth.
We have a walkthrough for setting up OAuth2 between Dime.Scheduler and BC on-premises via Docker - a safe way to rehearse before touching your test or production environment.
Step 1: Register the app [Microsoft Entra ID]
-
Sign in to the Azure portal.
-
Register an application in your Entra ID tenant:
- Give it a name, e.g. Dime.Scheduler for Business Central.
- Select the supported account type.
-
Add these Application API permissions:
- Dynamics 365 Business Central:
app_access - Dynamics 365 Business Central:
API.ReadWrite.All
- Dynamics 365 Business Central:
-
Grant admin consent. The result should look like this:

Step 2: Register the app in BC [Business Central]
The app exists in Entra ID, but BC won't let it through the door until it's listed on the BC side too. You'll need the app's application (client) ID, directory (tenant) ID, and a client secret.
- Search for Microsoft Entra Applications (or Azure AD applications on older versions) and open it.
- Create a new application:
- Paste the client ID into the Client ID field.
- Add a description, e.g. Dime.Scheduler.
- Assign permission sets to the company you're connecting:
D365 Basic ISVDime.Scheduler- plus any set needed to reach your custom objects
Step 3: Configure the connector [Dime.Scheduler]
The final piece: the client secret. In the Entra ID app, go to Certificates & secrets, click New client secret, and copy the value the instant it appears - you can't read it again later.
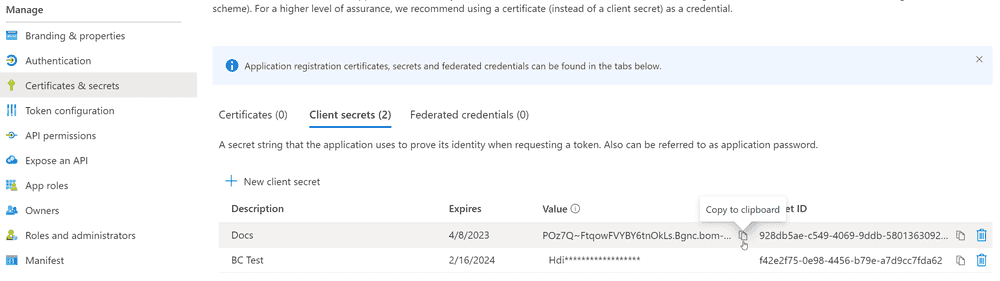
Then create the connector in Dime.Scheduler and fill in the Authentication section:
- Authentication type: MS Entra ID
- Tenant ID: the app's Directory (tenant) ID
- Client ID: the app's client ID
- Client Secret: the secret you just copied
Save it, and the OAuth2 connector is live.

Source App
One last field ties everything together. The source appSource appAn identifier Dime.Scheduler attaches to data so it can route a change back to the correct back-office system. on this connector must match the value you set in the FastTrack Wizard back in Business Central - it's how Dime.Scheduler knows that an appointment headed out through this connector belongs to the same back-officeBack officeThe ERP or business system Dime.Scheduler plans for - most often Microsoft Dynamics 365 Business Central. It owns the master data and remains authoritative over what it receives. system whose records came in under that source app.
If those two values don't match, the integration runs fine in isolation but the loop never closes: appointments leave Dime.Scheduler and end up nowhere BC can see them.
